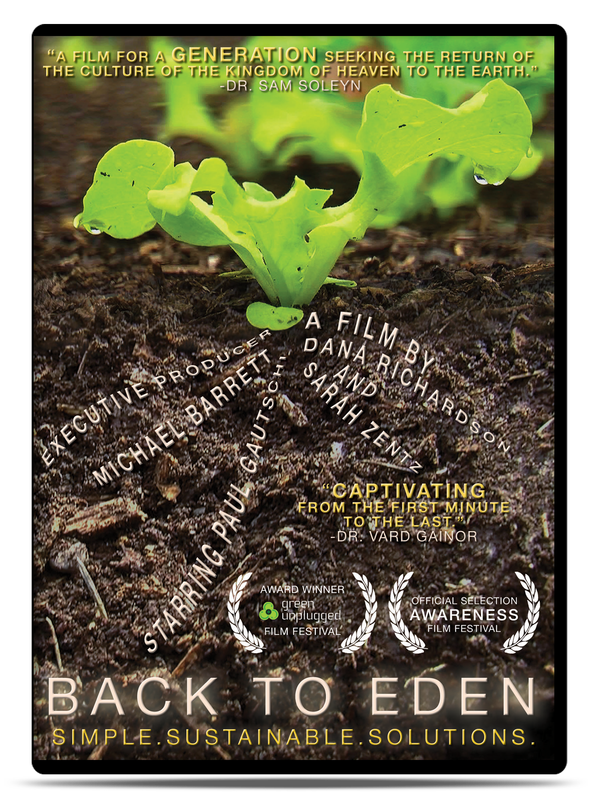
Back To Eden Gardening: Rich Soil Done Nature’s WayWritten By Kevin Author and Creator of Epic Gardening Have you heard of the Back to Eden gardening method? If not, you should. This gardening technique will greatly improve your soil tilth and fertility over time. It promises a major reduction in tough weeds and the ability to grow almost everywhere. Water conservationists should rejoice, as this technique is great for drought conditions. But what exactly is the Back To Eden gardening method? Let’s break it down to a barebones layout of how it works and how to do your own. It does take time, but it will reduce your labor over future years and make gardening an enjoyable, easy task. 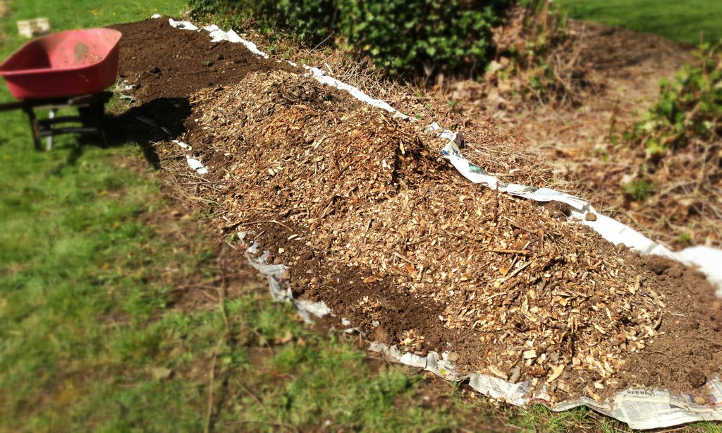 Back to Eden gardening is a layering method which develops good soil structure. Source: Wellington Family Farm Origins of the Back To Eden Gardening MethodPaul Gautschi, the creator of the Back to Eden method, is a devout Christian. His beliefs are consistently mentioned in the documentary film about the method. But it’s those beliefs which inspired him to garden as he does. Named after the Biblical “Garden of Eden”, this method focuses on nature’s process. In the Garden of Eden, Paul reasons, everything grew without man’s touch. There was an abundance of every plant needed to sustain life. And yet, nobody was out fertilizing the soil. How could these things grow? He found his answer by examining the forest floor near his property. Years of decomposed leaves, twigs, and other plant matter had formed rich mulch. From there, his game plan focused on how to get mulch like that to develop with human aid. Since the soil is protected with this thick layer of decomposing matter, it is less prone to erosion. It does not bake in the sun, and it retains significantly more moisture. He experimented around his orchard trees and found that the method worked very well. But would it work the same for other plants such as vegetables? The answer, in short, is yes. Once the garden has become established over time, it becomes heavily productive. The thick natural mulch forms new soil over time and protects the older soil. Watering is almost completely unnecessary in his Pacific Northwestern environment. The mulch stores the rainwater, preventing it from evaporating away. The film delves deep into his spirituality and where it interlinks with his garden. It’s clear when watching it that he is a man of strong faith. But the truth is plain for both believers and nonbelievers alike. In replenishing the rich, natural mulch that coats the soil, we have a chance at our own personal Eden at home. And that’s worth striving for! If you’d like to view the entire documentary yourself, by all means do! It’s a beautiful film and explains the origins of Back to Eden gardening completely. A free link to the video’s below, and you can purchase a DVD of it on the Back to Eden website.  A layer of compost goes in before the mulch in your bed. Source: kightp In the meantime, read on to see my in-depth description of how to start your own Back to Eden garden. I’m going to provide some of the pros and cons of this method, and help you make it work with what you’ve got at hand. How To Do Your Own Back To Eden GardenI won’t lie to you. Starting the process entails time, some initial hard work, and a whole lot of mulch. It’ll take some planning, too. But once your garden is established, the hardest work ends. Then it’s simple maintenance and care, and your plot will become more fertile with the passing of time! Select Your SuppliesThe goal of this method is to use what’s readily available in your area. While for Paul that’s wood chips, for other people it may be dry leaves or wheat/rice/oat straw. Grass clippings are a popular mulch as well. But it’s not as simple as putting out these materials in the fall and forgetting about them until spring. While that does in fact work, you can significantly speed up the process. Traditional composting methods will kickstart your Back to Eden garden. In the spring, you’ll have rich, fertile black soil awaiting you! In essence, you’re using a “brown” material such as wood chips or dry leaves to protect the soil’s surface. These brown materials will decompose slowly over time. It’s possible to layer in lots of wood chips and let the process happen over years, which is what Paul’s done. For fast decomposition, you’ll need some “green” or nitrogen rich materials. If you’re using a batch of arborist wood chips, you’ll be getting a healthy mix of fresh green material in the browns. New shoots and fresh green leaves are nitrogen-rich sources of material. This makes it a nearly perfect material to use for the Back to Eden method! But what if you don’t have access to truckloads of wood chips? The entire point of Back to Eden gardening is that you should use what comes naturally in your area. There’s no reason this should have any costs associated with it whatsoever. Let nature provide for you. Look around your neighborhood in the fall. Are trees dropping leaves everywhere? If so, you’re set. Go ask the neighbors if you can rake up and haul away their leaves. Most of the time, they’ll be thrilled. Feel like mowing lawns? You can haul the clippings away. You’ll need a green waste to break down brown wastes, though. I like to use coffee grounds. Nitrogen-rich, they’re often thrown in the trash by local restaurants. Stop by the local coffee shop and see if they’ll fill up buckets of coffee grounds for you. Failing that, fresh grass clippings work well. Check with local golf courses or community parks and offer to haul off their lawn trimmings. Local chicken farms may have droppings you can haul away too. There’s no reason that this stuff should cost you a small fortune. In fact, if you’re willing to put in a little work for it, often it’ll be no cost at all. Your garden will love it, and you will too. Planting & Reaping The RewardsWith the Back to Eden gardening method, tilling isn’t required. In fact, you can start a Back to Eden bed right on top of an existing lawn if you want. It’s best to start this process in the fall so that your garden will be ready in the spring. Begin by putting down layers of newspaper or cardboard. The goal is to have a nice, thick layer that will help prevent weeds or grass from growing up through your mulch. If you’re using newspaper, use at least 5-6 sheets deep to make a barrier. Lightly moisten the newspaper or cardboard to help keep it in place while you work. If you have high-quality aged compost or another nitrogen source, put down a layer of that next. Usually 2-3 inches of compost is plenty to act as a starter in the spring. I prefer using well-composted manure as a base, as it makes for very rich soil. You can opt for a blend of screened soil and compost, too. Finally, top this off with a thick layer of wood chips, 5-6 inches deep. You can use dry leaves or pine needles, too. The goal is to completely cover your soil layer with your mulch. This keeps the soil from eroding away during rainy periods. And that’s it. You’ve got the basic plot ready. If you would like, you can drape black plastic over it to act as a warming agent and speed the decomposition more. You shouldn’t even have to do that much if you don’t want to! Now it’s time for nature to do its job. In the spring, your mulch layer should have significantly decreased in thickness. What was six inches of mulch should be down to two or three inches. Instead, on the surface you’ll have slowly-reducing particulate matter and aged mulch materials. This is perfect. When planting, it’s important to get your seeds down into the soil layer. Remember that aged compost you put down below your wood chips? Gently pull the chips back to expose that, and plant your seeds there. The roots will develop in that and will be able to penetrate your cardboard or newspaper layer. As the seeds germinate, the mulch should remain pulled back from the soil to allow the sun to reach it. But as your plants develop and grow, begin sliding the mulch back around them. This protects the soil at the base of the plants and helps keep moisture in the soil. Watering in the Back to Eden gardening method is easy, too. All that mulch will hold moisture. While you’ll need to water when you’re starting seed, once the mulch is back in place it’ll be less and less. As the soil builds up a heavy stockpile of organic material as time goes on, it’ll hold its own water. In particularly hot weather, you can place a soaker hose under mulch to add extra water if you think it’s necessary. You might find it’s not needed! 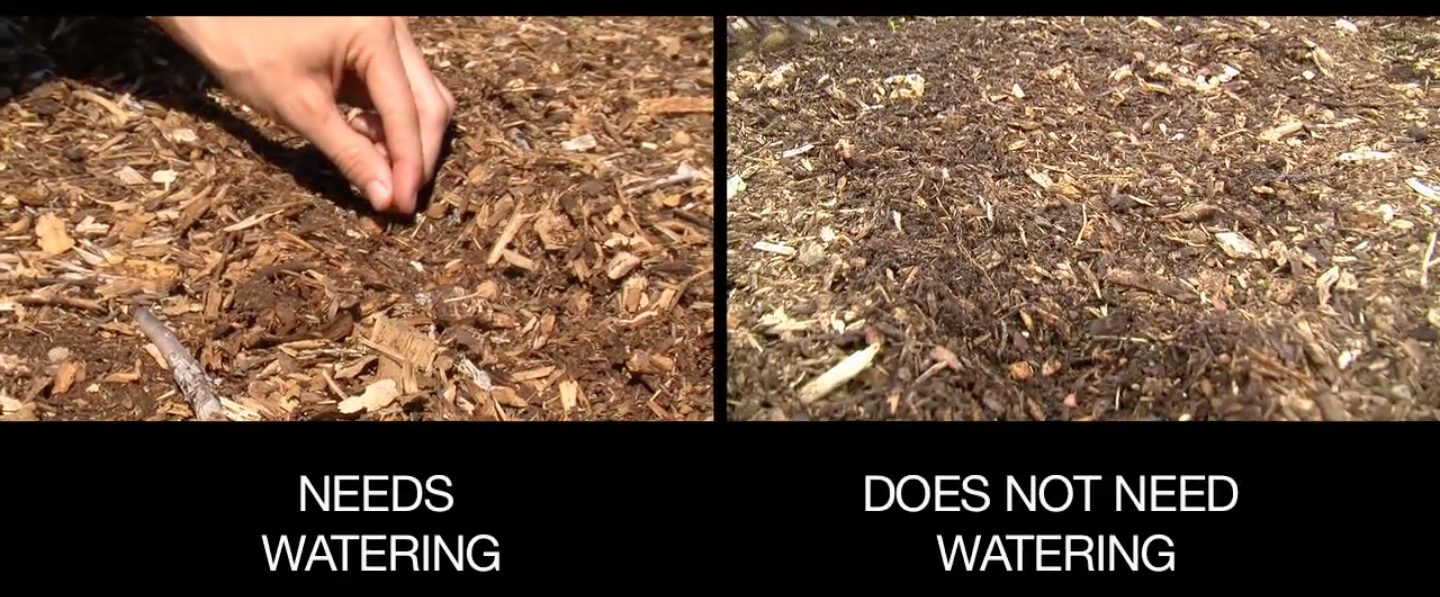 Image from Back to Eden Film Subsequent Years In The Back To Eden GardenOnce you’ve started using the Back to Eden gardening method, how do you maintain it over time? Here’s a few tips for maintaining your Back to Eden garden and keeping it going for years to come! 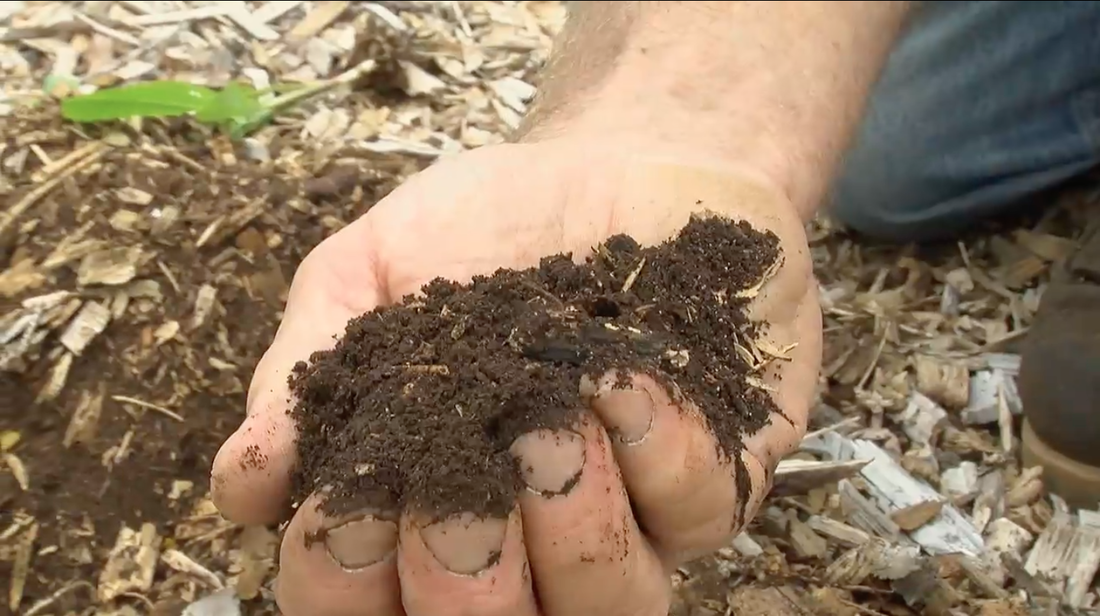 Image from Back to Eden Film Weeding In The Back To Eden Gardening MethodWeeding is very simple in this gardening method. Because the weed seeds will be landing in the mulch, they won’t have the benefit of the soil below the mulch layer. As long as you maintain at least 3″ of mulch around your plants, their roots will be shallow and they’ll be easy to remove. In most cases, you can grasp the weed at its base and lightly pull upward, and it’ll slide right out of the mulch. In cases where the weeds have a deep taproot, it should still be very easy to remove. The soil beneath the mulch should be moist enough that a little tug will free the weed. No gardening method is truly weed-free, no matter how much we’d like it to be. And Back to Eden gardens will still have their share of weeding to do. But it should be significantly less weedy than bare soil gets, and removal is much, much easier. Maintaining Your Back To Eden GardenOver time, your mulch covering does break down. That’s good, because it’s doing exactly what you want it to do! But as it breaks down, it needs to be replenished. Using more of the same mulch can work over time, especially if it’s fresh arborist’s chips. Since those have plenty of green waste in the brown waste, you have a nearly perfect compost material. Even then, the brown wastes will tend to linger, especially larger chunks. Look at what you’ve already put down, and see what remains. Is it a lot of bigger chunks? Those are going to take time and more nitrogen. Is it all small particulate? You may need a brand new layer of mulch just like your first year. I personally recommend using a variant of lasagna gardening techniques. Don’t try to mix new material through your old mulch. Instead, place a new layer overtop of whatever new material you’re adding. In the Back to Eden film, Paul adds a layer of composted chicken manure over his mulch. Mixed through that manure is a mixture of broken-down yard waste, too. By doing that, he’s adding a good nitrogen source. That’ll keep the decomposition active and ensure even the larger bits break down. For those who aren’t using arborist’s chips, it may be a bit more complex. If you’re using straw, for instance, it has some nitrogen like a green waste. But about 70% of straw acts as a brown waste. A layer of composted manure or grass clippings might help. You also want to avoid making a dense mat. Stuff like straw, grass clippings, and pine needles will get matted together. While that’s great for preventing soil erosion, it can slow decomposition. And if that mat’s been absorbing water for too long, it may develop mold or get slimy. That’s not fun to work in! You’ll need to vary your treatment to suit your specific location’s needs. That’ll be a process of trial and error at first as you settle into a pattern that’s right for you. But in time, you’ll have great benefits as you develop rich, fertile soil. What About Fertilizer? |
AUTHORS
Dana Richardson & Sarah Zentz, Producers of Back to Eden Film
 Categories
All
 |
 RSS Feed
BACK TO EDEN GARDENING |
JOIN THE MOVEMENT |
CONTACT US |
© 2022 Back to Eden Film. All rights reserved.