|
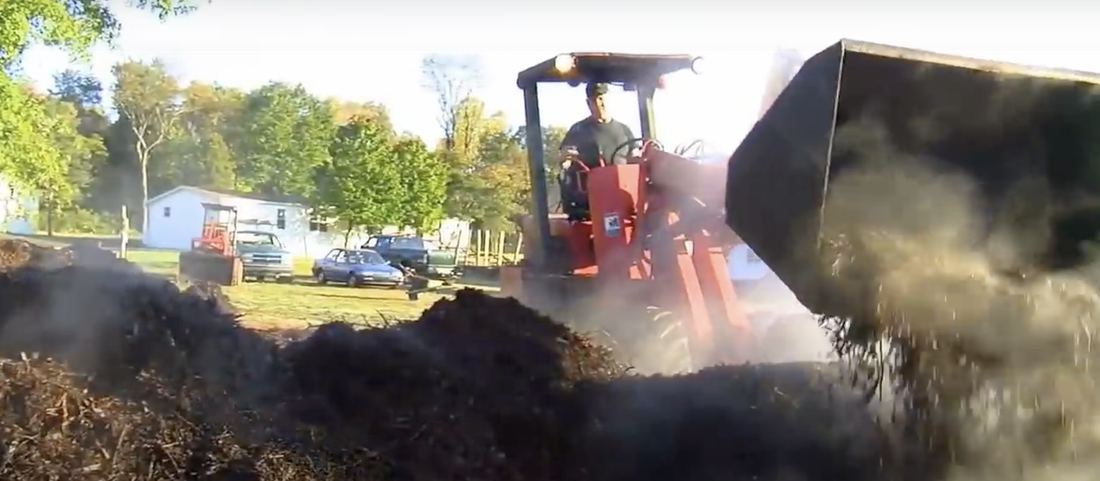
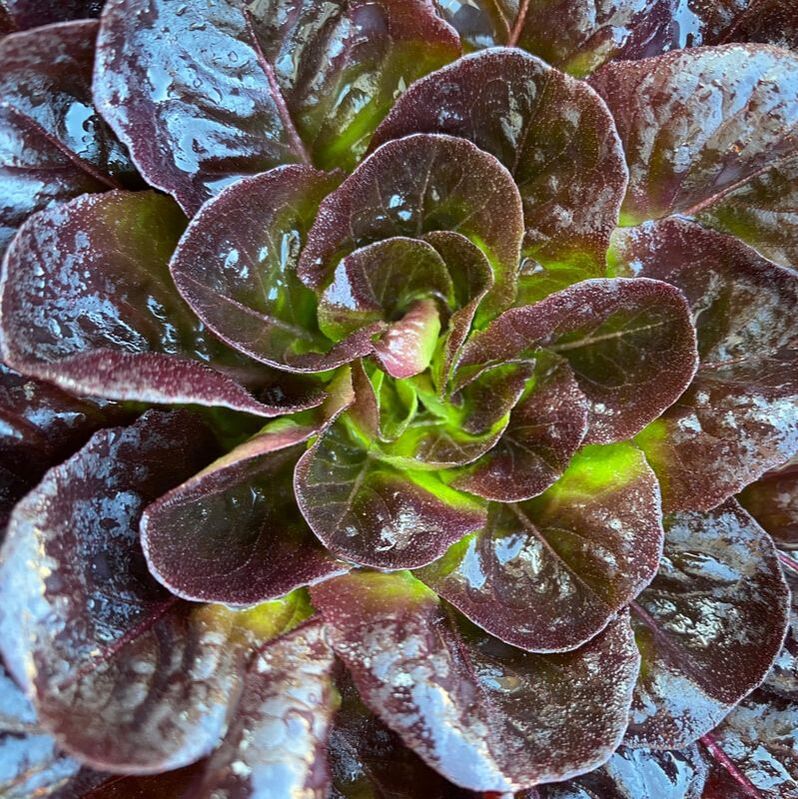
Wood chip compost is an excellent addition to your vegetable garden but wood chips can take a long time to break down and turn into compost. The good news is you can speed up the composting process by hot composting which will turn your pile of arborist wood chips into composted wood chips in as quick as several months! We recommend hot composting because it kills weed seeds and sterilizes the organic matter making it safe to use in a garden. Your compost pile will also be creating beneficial microbes that will benefit your soil. Hot composting is the quickest way to compost wood chips and will create a premium gardening material. Most likely, you just received a free delivery of arborist wood chips from the ChipDrop App. Congratulations! Now let's turn that pile of fresh cut wood chips into composted wood chips! If you haven't yet, you can sign up today to get a free delivery of arborist wood chips! Fresh cut wood chips can be used in your garden as mulch immediately. However, adding a layer of compost below arborist wood chips will help the wood chips benefit your garden immediately. If you have the space and time to compost wood chips, this would be the premium compost! The facility where Paul Gautschi gets his wood chip compost for his vegetable garden has undergone a similar hot composting process as we will be teaching you recreate today.  HOT COMPOSTINGThe hotter a wood chip pile gets, the quicker it composts. When you are hot composting, you may find it useful to use a compost thermometer. This tool will help you maintain the perfect temperature while composting. There are typically three ranges shown on the gauge - warm, active, and hot. If your pile is warm, that means it is time to turn your wood chip pile. The goal is to keep your wood chip pile in the active to hot range which is approximately 100-160 degrees. It also helps you from overheating your pile and drying it out. We recommend REOTEMP Backyard Compost Thermometer that is a high-quality and accurate compost thermometer for backyard gardeners! 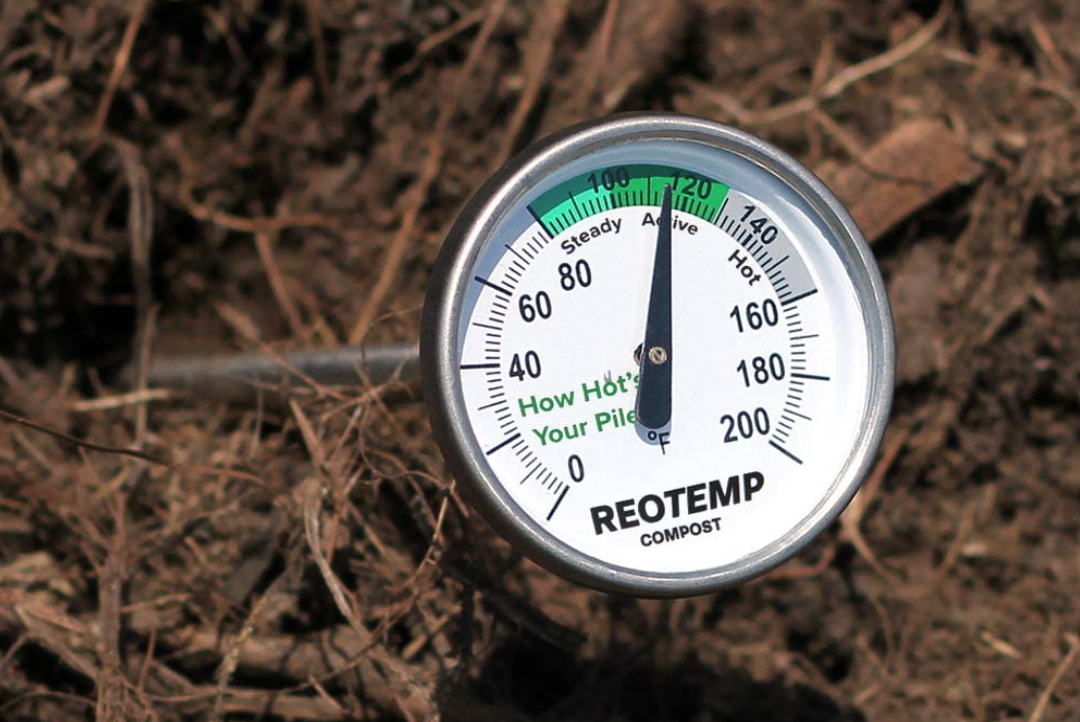 HOW TO SPEED UP COMPOSTINGSMALLER WOOD CHIPS COMPOST FASTERNot all arborist wood chips are chipped to the same size. If you received a load of coarse wood chips, you can run them through a wood chipper to reduce the size. The smaller the wood chip the quicker it will decompose. BIGGER PILES COMPOST FASTERNot all deliveries of arborist wood chips are of the same quantity. If you received a bigger pile of wood chips, that is great because they will compost faster! A big, tall pile of wood chips is best! INCREASE NITROGEN TO CARBON RATIOTake a look at the ratio of carbon to nitrogen in your wood chip pile. Arborist wood chips have a high carbon to nitrogen ratio that typically is 300:1 or higher. You want to make sure that there is a source of nitrogen in your wood chip pile. You should see green leaves and needles also called "green yard waste." The microbes that break down the wood feed on nitrogen. Therefore, the microbes will be able to work quicker if you have nitrogen. Don't panic if you don't see a lot of green yard waste. You can add excellent sources of nitrogen including animal manure, blood meal, grass clippings, or leaves to your pile.  INCORPORATE OXYGEN AND WATEROnce you have a higher nitrogen to carbon ratio, you will notice almost immediately that your wood chip pile begins to heat up. You may even see steam coming off the pile! This is an excellent sign it is working! Heating up your wood chips is the quickest way to compost wood chips. The only two missing ingredients after carbon and nitrogen are oxygen and water. 1. Oxygen - Although it is not recommended to turn your pile frequently, you can turn your wood chips to aerate the pile which will increase the heat. The goal is to move the material on the outside of the pile into the middle where there is the most heat. Plus, microbes need oxygen. 2. Water - Add water to your wood chip pile enough to make it wet. You don't want to over soak it but you also don't want to dry it out. Microbes need water to survive so make sure they don't get too thirsty. ADD BACTERIA & FUNGINature is incredible! Fungi and bacteria are the microbes that will naturally find their way into your composting wood chip pile. You may notice mold in your compost pile and this is a wonderful sign that tells you the microbes are working at breaking down the organic matter! You can inoculate your compost pile with fungi. BE PATIENT!Most people decompose arborist wood chips into composted wood chips in approximately 6 months. However, there is no set time that we can tell you to compost your wood chips. You need to be actively monitoring the pile to make sure it stays "active" and "hot." There are many factors that influence how long it takes to compost wood chips including where you live, the time of year, the weather, the size of the wood chips, the size of the pile, your nitrogen to carbon ratio, the number of fungi, the type of wood, etc. It is important to be patient. HOW TO USE COMPOST IN A GARDENOnce your wood chips have composted, you can add this organic matter to your vegetable garden for superior growth. You will be amazed at the quality of compost you built and how much your fruits and vegetables love growing in compost! Practice the Back to Eden Gardening method and add composted wood chips to your garden.  HOW TO START A VEGETABLE GARDEN
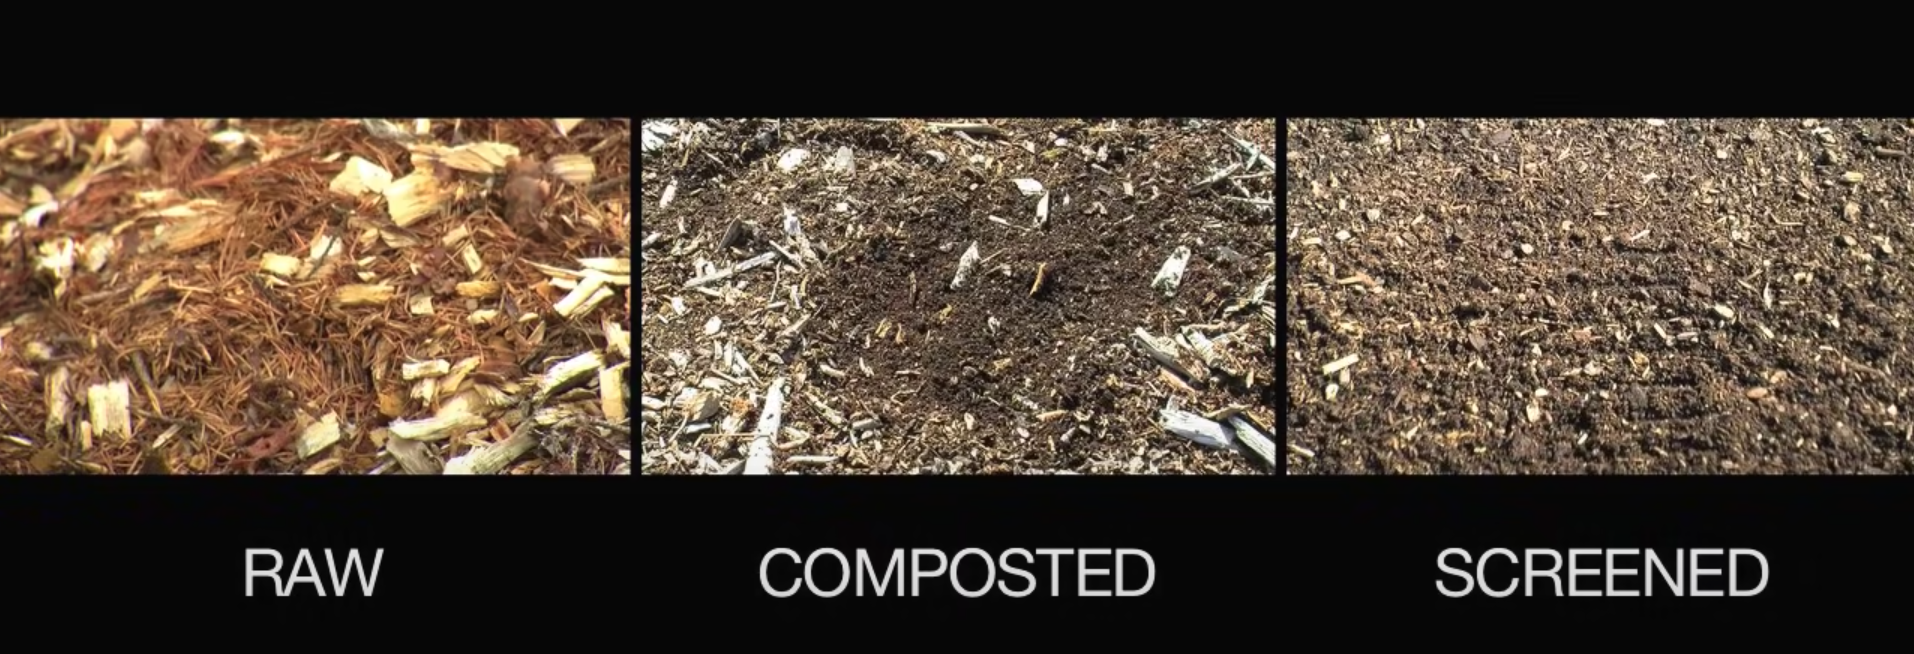
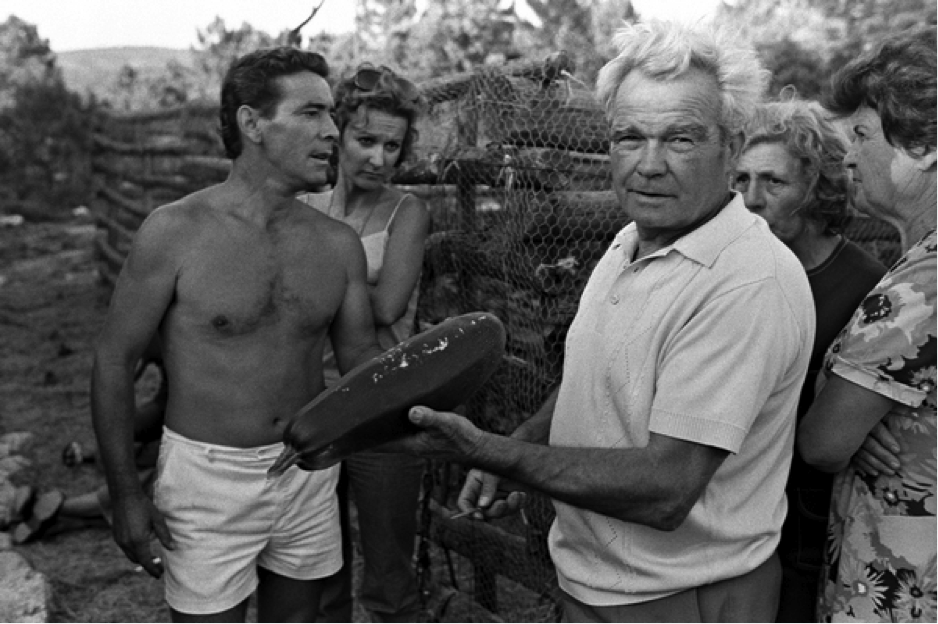
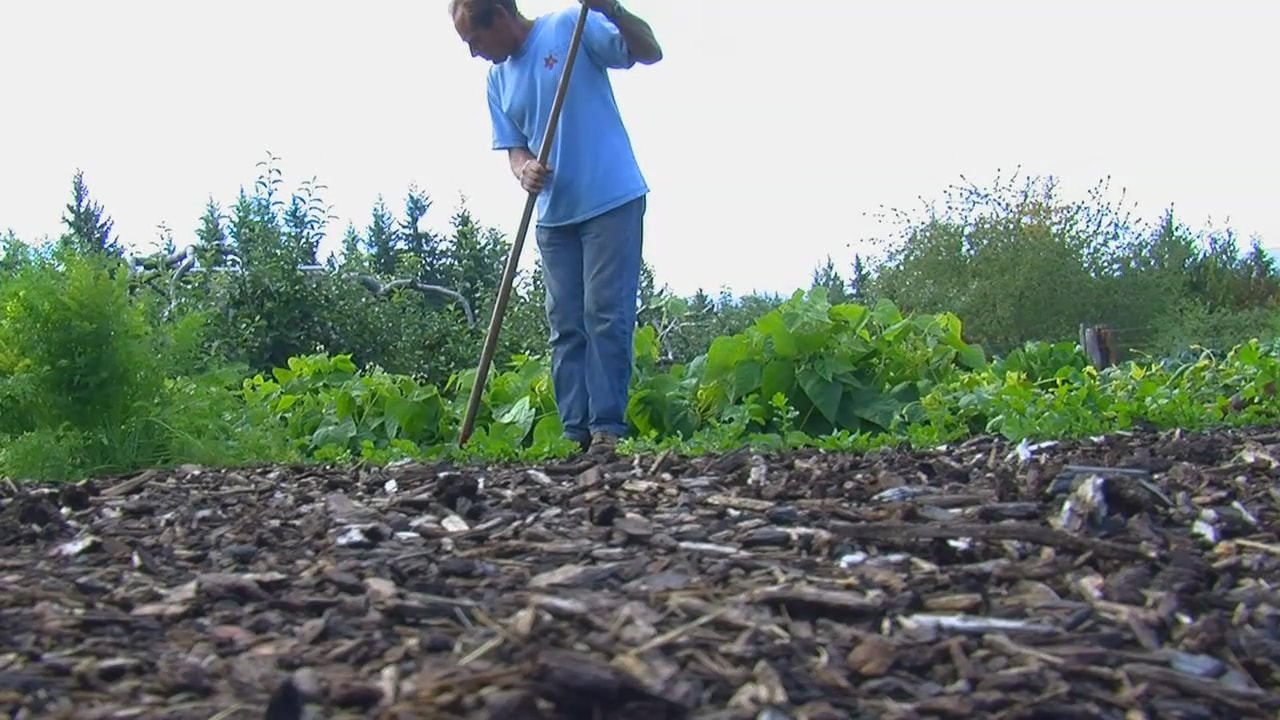 Paul raking wood chips in his Back to Eden veggie garden. We are Dana & Sarah, the Producers and the Directors of BACK TO EDEN. Our documentary, Back to Eden, ignited a gardening movement that quickly earned the name, "Back to Eden Gardening." The film aimed to inspire gardeners to grow food by documenting the incredible gardens and orchards of American gardener and arborist Paul Gautschi. At the time of the production in 2010, Paul had been growing food at his home in Washington for over 30 years -- since 1979! It was challenging for us to get Paul to describe exactly how to "start a Back to Eden garden." In fact, we spent an entire year tirelessly filming and editing this documentary. As novice gardeners, we didn't fully understand how miraculous Paul's vegetable garden and fruit orchard are compared to other gardeners. Our intention was to inspire the viewer to grow food and teach a simple, sustainable gardening method. However, we have noticed that it's easy for information to get lost in translation online and we would like to clear some things up from our first-hand experience. THE TRUTH ABOUT BACK TO EDEN GARDENING The truth is Back to Eden Gardening works! Paul Gautschi is a world-renowned gardener because he practices a sustainable permaculture method that eliminates most of the stress and work associated with gardening. He teaches a gardening method that is so profoundly simple that anyone can do it! That said, many gardeners make mistakes and we would like to reduce the number of problems people have with the Back to Eden gardening method! First, we are going to talk about Paul's two separate growing areas: Paul's Garden and Paul's Orchard. In one of the first opening shots of the film, you see Paul's property, an aerial view from a plane that was filmed in the middle of Winter. You can see in the photo below the separation of the garden and orchard. 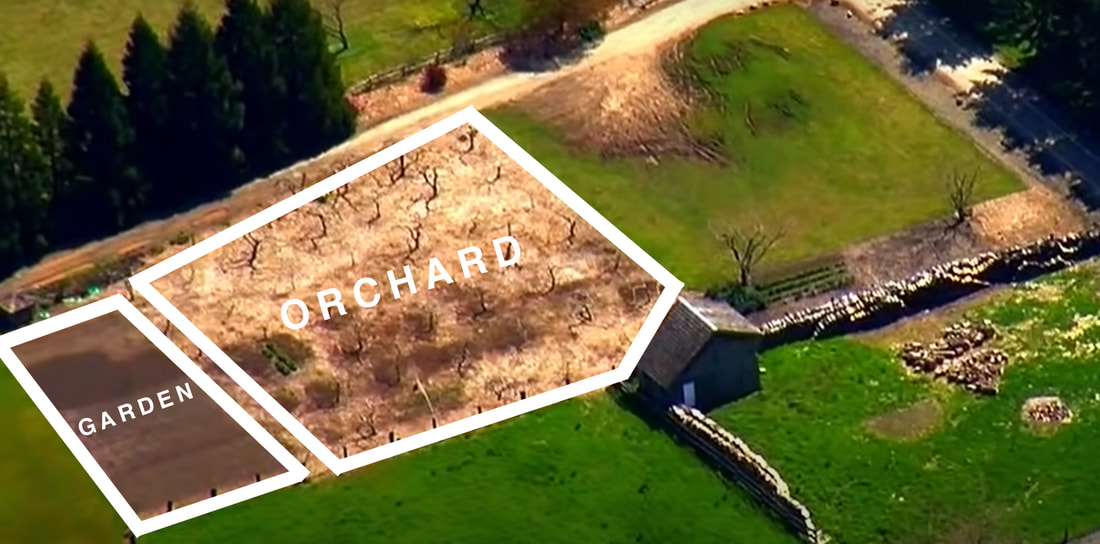 From this photo alone, you can clearly see that the ground looks different in Paul's garden and orchard. The garden has a dark, rich, black gold compost that looks similar to topsoil. The orchard has a much lighter shade that resembles arborist wood chips. Why do they look different? They are both wood chips from tree trimming waste. The difference is they have each been processed using two different methods. Confusing? Let's dig a little deeper. PAUL GAUTSCHI'S BACK TO EDEN GARDENPaul's Back to Eden garden is where he grows beautifully straight rows of annuals such as carrots, celery, cilantro, beans, beets, cucumbers, lettuce, chard, spinach, parsley, kale, and so much more at his home in Washington. At the very far end of his garden is where he grows the perennial asparagus. Look at the beautiful ground Paul is standing on in this photo! 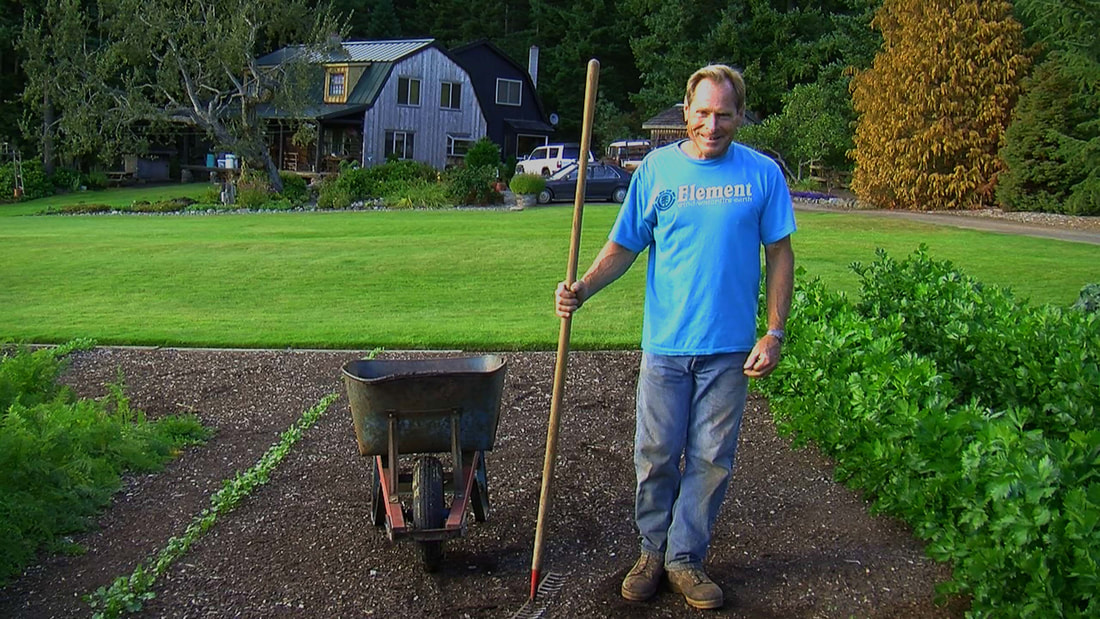 WHAT DOES PAUL ADD TO HIS GARDENS? COMPOST! There are only two times in the documentary when you see Paul add organic matter to his garden. The first time Paul adds compost to his home garden is after he visits a compost facility. Steve Johnson, the owner of Lazy J Tree Farm, invested in a tub grinder to chip up green yard waste. Steven then composts the wood chips for several months and sells the composted wood chips back to the community. In the film, you see Paul receive a truck bed full of composted wood chips that have also been screened. This is so important to understand and perhaps the biggest point that needs clarity: composted wood chips that have been screened are different than arborist wood chips that have been freshly chipped. In the film we show 3 types of "wood chips" that were all processed differently.
 The film never shows Paul Gautschi adding fresh arborist wood chips to his Back to Eden garden. Why? Paul does not add fresh arborist wood chips to his Back to Eden veggie garden at his home. Paul adds composted wood chips that have been screened -- the premium source of wood chips! Why? Wood chip compost is ready to plant directly into and will immediately give your plants the nutrient food they need. In the film, you watch Paul add the composted wood chips that have been screened onto his garden plot, carefully raking them to a thickness of 2 inches. Paul at the time of filming said he reapplies composted wood chips that have been screened every 3 years. Let's say you just got a FREE delivery of arborist wood chips dropped off at your garden using the Chip Drop App. You can create your own wood chip compost by hot composting your wood chip pile. Learn how to compost wood chips by hot composting your wood chip pile here. 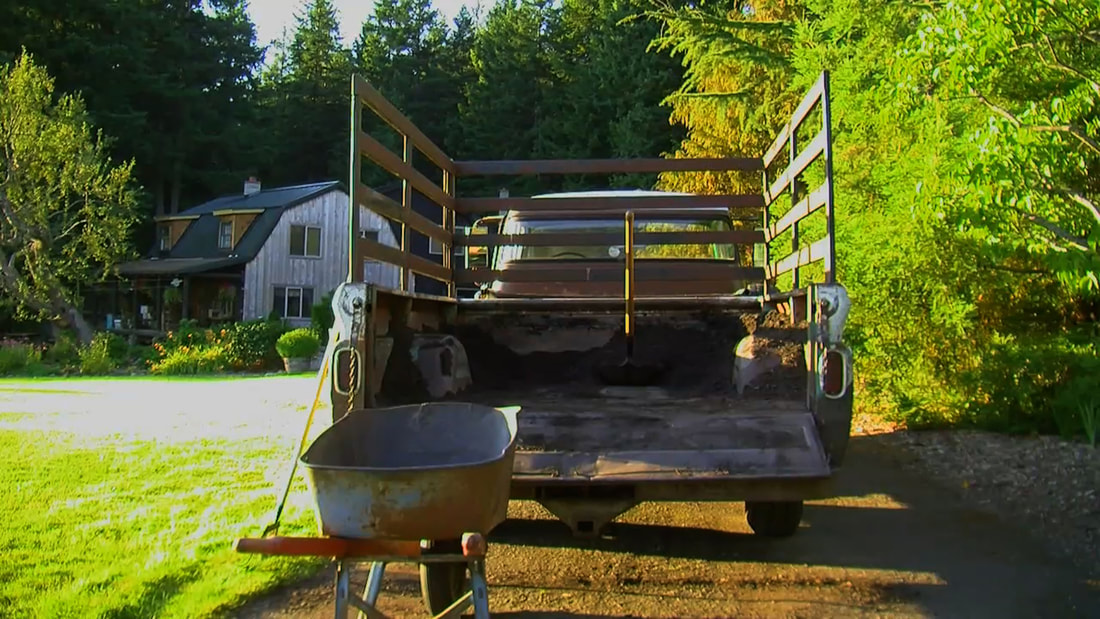 Paul's truck load of composted & screened wood chips. WHAT DOES PAUL USE TO FERTILIZE HIS GARDEN? COMPOSTED CHICKEN MANURE! The second time Paul adds compost to his home garden in Back to Eden Film is after he sifts compost out of his chicken run. Paul lovingly calls his chicken coop his "soil manufacturing plant." He feeds his chickens any of the green waste that comes out of the garden -- from weeds to expired greens. In the Fall, Paul uses a screen and wheel barrel to sift through the soil in his chicken run. He then applies about 1/2 inch to 1 inch of the composted chicken manure onto his garden. Organic composted chicken manure is one of the best sources of nitrogen for fertilizing your garden. Since Paul has been doing this for so many years, he says he needs to add less fertilizer every year and less often over time. At the time of filming, Paul told us he reapplies composted chicken manure every other year but we recommend doing this every year when you are getting started with your Back to Eden Garden. Again, if you are using Raw Arborist Wood Chips you'll especially benefit from adding organic fertilizer to help break down the wood chips into compost. Although in the film you see Paul applying composted chicken manure to the garden second, during the Fertilization chapter, Paul actually applied the composted chicken manure first and then covered it with the composted wood chips from the compost facility. The reason he does this is to reduce any weed seeds from sprouting that are in the composted chicken manure. 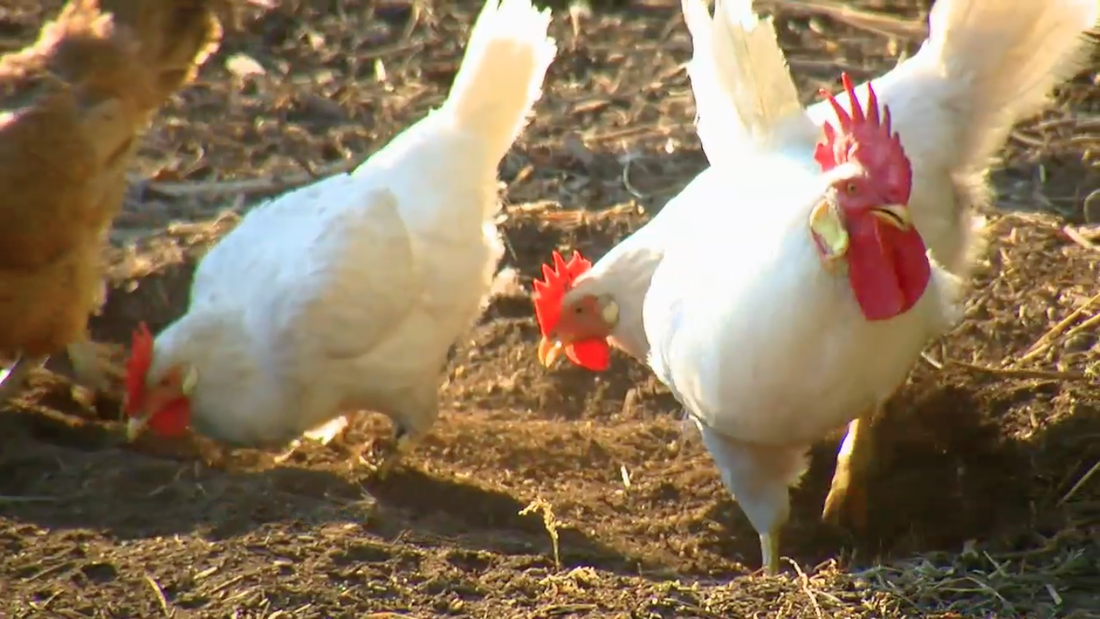 PAUL GAUTSCHI'S BACK TO EDEN ORCHARDPaul Gautschi's Back to Eden Orchard is definitely the most beautiful orchard we've ever walked through. Many visitors from around the world have agreed! It is filled with dwarf fruit trees including apple trees and pear trees that are loaded with fruit. Underneath the fruit trees and throughout the orchard, Paul grows vegetable plants including zucchini, cabbage, broccoli, and more. You can see the stunning orchard behind the garden in the photo below.  Paul Gautschi's Back to Eden vegetable garden with fruit orchard in the background. WHAT DOES PAUL ADD TO HIS ORCHARD? RAW ARBORIST WOOD CHIPS! In the film, Paul mentions that in 1979, he first added straw and sheep manure to his orchard but then switched to wood chips. Paul told us in person that initially, he added 12 inches of fresh arborist wood chips to his orchard. He allowed the wood chips to compost in place without tilling. He goes on to explain that after 17 years of tilling his garden, he went out to his no-till orchard and began digging with his hands. He says he dug "down to my elbow in this beautiful black compost." He had been laboring in his garden, tilling and bring in organic material to try to build compost. In his orchard, he didn't do any work other than initially covering it with fresh arborist wood chips. At that moment Paul says God told him, "it works in your garden the same way." Paul then threw away his rototiller and began covering his garden with composted wood chips. Paul told us he does not add chicken manure or other fertilizers to his orchard. The raw arborist wood chips built fertile enough soil on their own over time. He also adds the waste from his wood stove to his orchard over the winter, because he has it. 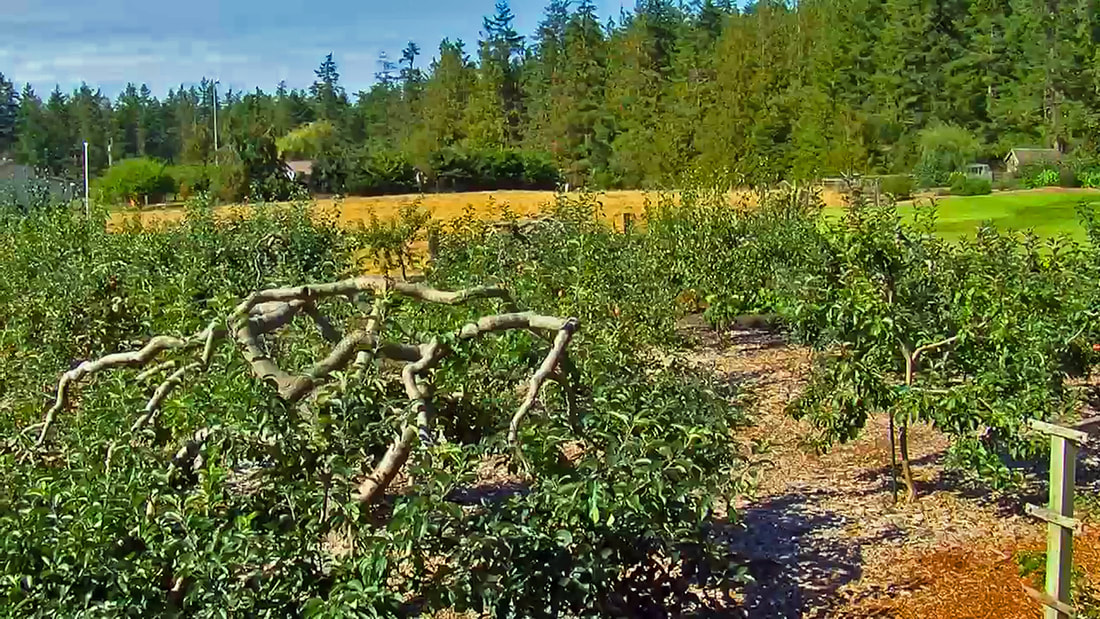 Paul Gautschi's orchard with Raw Arborist Wood Chip mulch. If you do the math, by the time we arrived to film the documentary in 2010, Paul had been growing a no-till wood chip mulched orchard for nearly 30 years and a no-till wood chip mulched vegetable garden for nearly 15 years. Therefore, the documentary shows the results of a no-till wood chip vegetable garden after 15 years and the results of a no-till wood chip mulched orchard after 30 years! This is a really big deal for those of you who are just starting a Back to Eden garden and/or orchard and are hoping to see results like Paul. The good news is that you can see results like Paul, it will simply take time and patience! 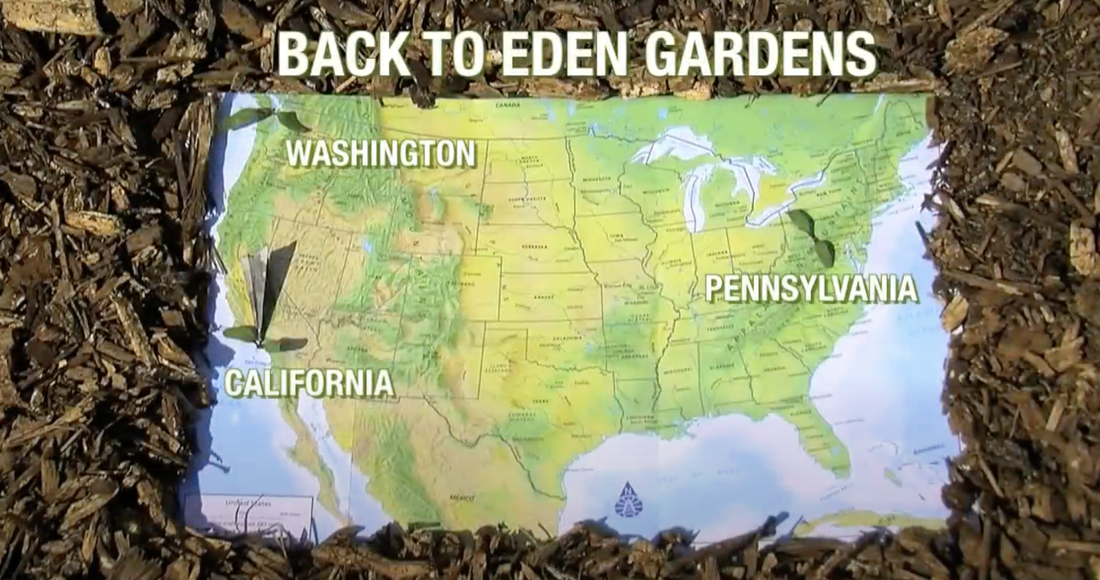 Back to Eden Demonstration Gardens in Western and Eastern USA. BACK TO EDEN DEMONSTRATION GARDENS As filmmakers, our goal was to reduce the amount of mistakes people would making practicing the Back to Eden gardening method. Therefore, we dedicated 20 minutes of Back to Eden Film to documenting "Back to Eden demonstration gardens." Paul consulted both of our families while they installed a Back to Eden garden for the first time. 1. Demonstration Garden in California The demonstration garden CA featured Dana Richardson's family. Ron & Sylvia demonstrated adding a layer of premium composted wood chips that had been screened onto their vegetable garden. Since they had access to screened, composted wood chips (just like Paul) this was the easiest solution for their urban garden. They were able to sow seeds directly into the compost and also plant transplants. 2. Demonstration Garden in Pennsylvania The demonstration garden in PA featured Sarah Zentz's family. Mark & Diane actually installed two gardens. In the first garden, they only added newspaper and 4-6 inches of fresh arborist wood chips in the Fall. When they planted in the Spring, there were a few problems. The first mistake was planting in the wood chips instead of the soil beneath the wood chips. Therefore, many of the plants were lacking nitrogen. To fix this, Mark added a dried blood meal, an organic fertilizer. This mistake could have been avoided by either planting in the soil beneath the wood chips, adding composted wood chips instead of fresh arborist wood chips, or waiting longer to allow the arborist wood chips to compost. Mark was determined to get it right so we installed a second demonstration garden in the Spring. This garden wash installed with a layer of newspaper, 2-3 inches of mushroom compost, 3-4 inches of composted wood chips, less than 1 inch of composted cow manure. Since this garden had compost added, they were able to immediately sow seeds directly into the compost below the wood chips. This garden grew prolifically without any problems. Now, 10 years later, Mark has uploaded a YouTube video showing the 10-year results! BACK TO EDEN GARDEN TIPS FROM THE FILMMAKERS The take away from Back to Eden Film is to cover your garden with wood chips. The easiest (and free) resource for home gardeners is arborist wood chips. Fresh arborist wood chips need time to decompose before they are ready to plant in. Here are some of our tips: 1. Do not plant seeds directly in fresh arborist wood chips. Arborist wood chips need time to decompose before they are ready. That is why we recommend to mimic nature and add arborist wood chips in the Fall. In the Spring, pull back the coarse wood chips and plant in the soil and/or compost beneath. 2. Add composted wood chips (ideally, that have been screened) instead of fresh arborist wood chips if you have access to this resource! Of course, not everyone has access to this premium organic matter. If you want, you can allow your delivery of arborist wood chips to compost before you add them to your established vegetable garden. Learn how to compost your arborist wood chips here. 3. Do not till the wood chips into your soil! Since wood chips are high in carbon, they can tie up nitrogen when they’re tilled into the soil. 4. Be patient! Every year you are building more and more soil in your vegetable garden by adding organic matter which is creating more nutrient-rich food for your plants. HOW TO START A BACK TO EDEN GARDEN
We want to close this article by saying, Paul's somewhat mystic, read-between there lines teaching techniques are not accidental. Paul explained to us again and again as we drilled him for a "one size fits all formula" for growing a Back to Eden Garden that one size doesn't fit all. Paul constantly reminded us that he wanted people to get connected to nature in their region and adopt what works best for them. As frustrating as this can be for people who prefer rigid instructions, it was actually a stroke of genius on Paul's part. There isn't just one way to start a successful Back to Eden Garden. But there certainly are some things you shouldn't do. Remember to Avoid the Most Common Back to Eden Gardening Problems! 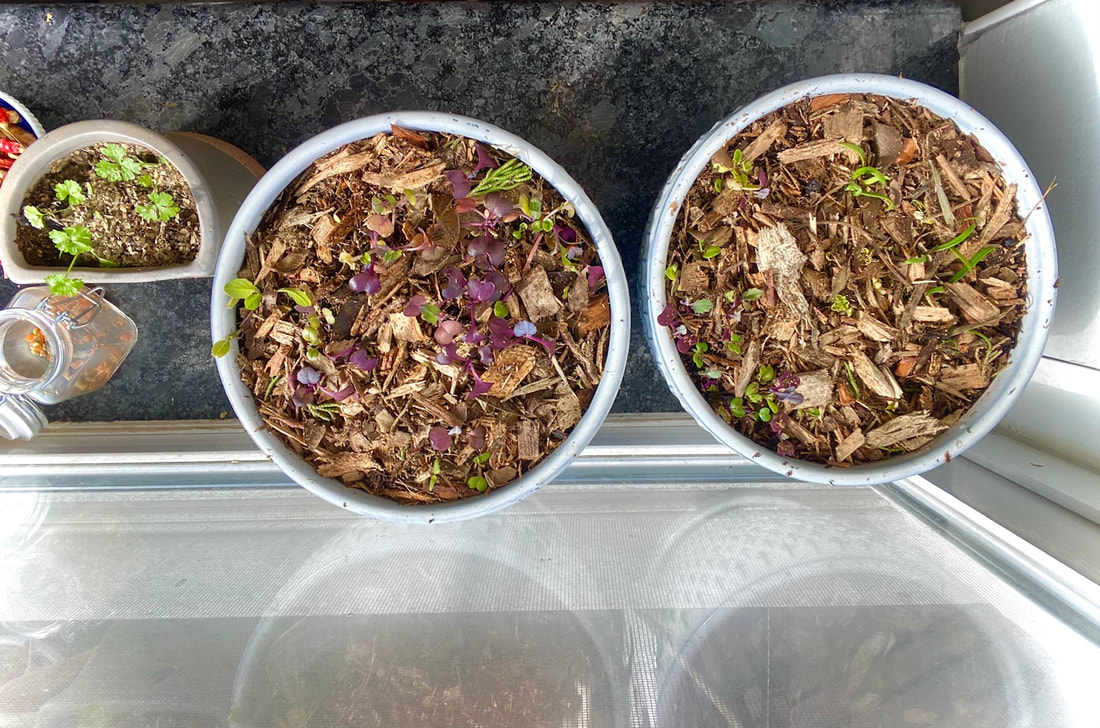
Growing Microgreens and Herbs Indoors with Back to Eden Gardening
GROWING VEGETABLES INDOORS LITERALLY PROMOTES HAPPINESS
Winter can be a difficult season for those of us who are obsessed with gardening as we anticipate the coming growing season. In fact, when we stop growing our own food during the winter many people literally experience negative impacts on our mental and physical wellbeing. Just because it's winter doesn't mean we can't get our hands dirty! Recent studies have confirmed that touching soil literally boosts levels of serotonin, the chemical in our brains that is responsible for maintaining a positive attitude. The bacterium called Mycobacterium Bacchae that lives in soil reacts when in contact with our skin to promote our bodies ability to reduce stress and anxiety. This may explain why many of us associate summer gardening months as a generally joyful time of year. It also serves as reminder of the benefits of growing food year round for our mental and physical health. Especially during cold and flu season our bodies need extra vitamins and minerals to maintain healthy immune systems. Growing a few simple vegetables and herbs indoors can have an immense positive impact on the way we feel and the way we eat.

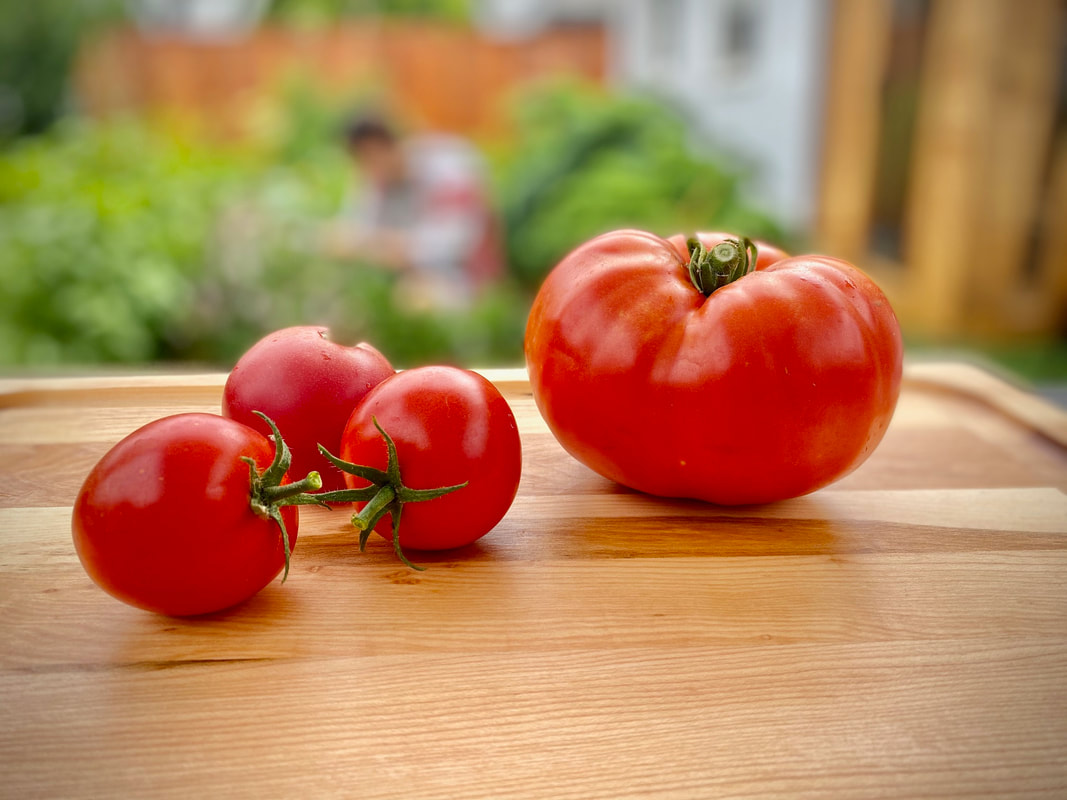
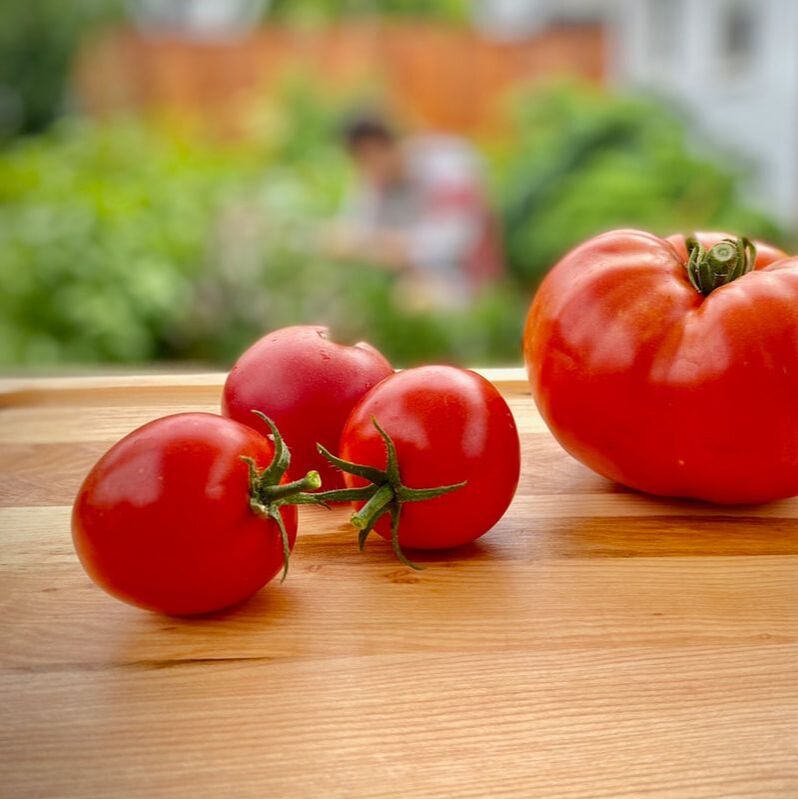
Tomatoes are Easy to Grow Indoors Or As Starters for Transplanting
Growing Food INDOORS IMPROVES NUTRITION
Growing veggies indoors also helps improve our daily eating habits. Winter is a time when our bodies tend to get less physical activity and we intake higher calorie foods. However, studies show that people who grow their own food are more likely to maintain healthier diets year round. Think about it, when there are a fresh array of herbs and greens growing in your kitchen windowsill you will be much more likely to reach for these healthy foods instead of grabbing processed junk foods from your pantry. Many people don't realize just how many beneficial vitamins and minerals are packed into even the smallest amount of home grown organic herbs and veggies! Compared to store bought produce, the nutritional value is up tp 70% higher in organic home grown veggies. Growing food indoors will save you tons of money and require less trips going to the grocery store.
How to Start seeds indoors for transplant
If you want to get prepared ahead of time for your outdoor veggie garden this spring, you may want to start some slower growing fruits and veggies indoors at this time. Here in the US, we are in the heart of winter which is a great time to carefully organize your seed supply, regional planting dates, and plant any starters for crops you want to get a head start on.

Corsican Mint Growing Indoors - It's Tiniest Mint That Exists!
Benefits of planting early starters indoors:
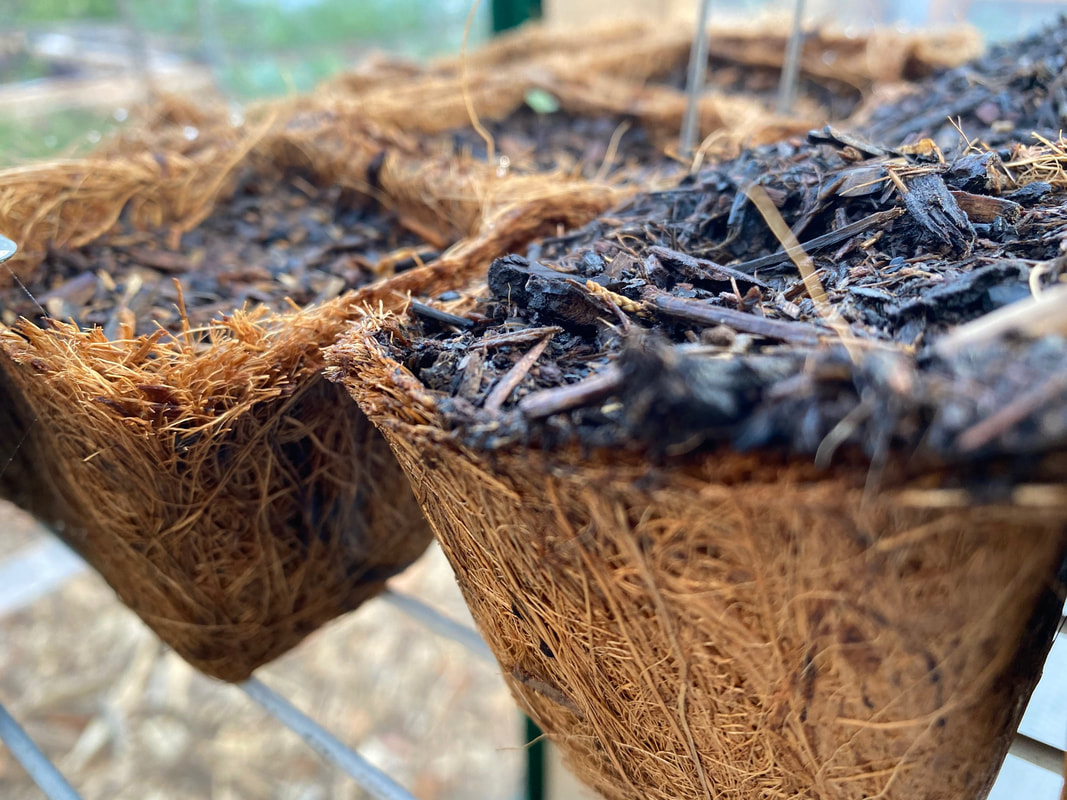
Biodegradable Seed Starter Containers with Wood Chip Compost in a Green House.
Problems to avoid with indoor starters:
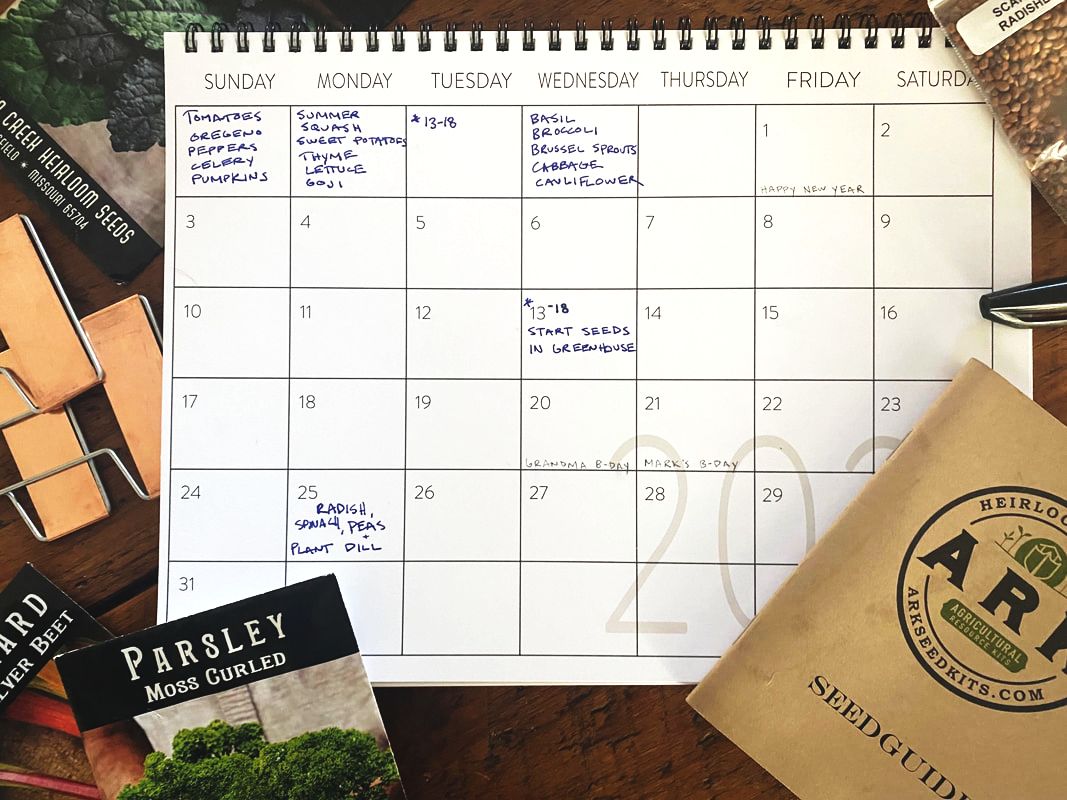
Growing Calendar - Planning Seed Planting Dates
FIND REGIONAL PLANTING DATES
The Old Farmers Almanac has a great gardening planting calendar where you can search your zip code to find planting dates for your zone. Click on the button below and enter your gardening area zip code to view your custom seed planting date schedule. The dates are very specific according to plant variety based on age old farming wisdom based on regional weather patterns and moon phases. I grabbed a calendar and scribbled in some key dates to make sure I don't miss any growing time this year!
Biodegradable Seed Starter Trays and Wood Chip Compost
Back to Eden Gardening is an organic, no-dig, no-till vegetable gardening method that utilizes wood chip compost as a growing medium and arborist wood chips as a sheet mulch. But can Back to Eden Gardening work indoors? Of course!
Back to Eden Gardening indoors may be beneficial for you if live in a climate with harsh winters, want to get a head start on your growing season with starters or lack sufficient space for gardening outdoors. If you already have a backyard Back to Eden Garden started making the transition to growing indoors as well is especially simple! We recommend using wood chip mulch from arborist tree trimmings to top off your indoor pots and starter containers. This not only improves the moisture retention of your soil, but also deposits beneficial microbes and nutrients into the soil that are very important for indoor starters since they cannot access them otherwise like in the case of outdoor garden soil. Lets get started with the simple tools you'll need to get started! How to GROW BACK TO EDEN GARDENS INDOORS
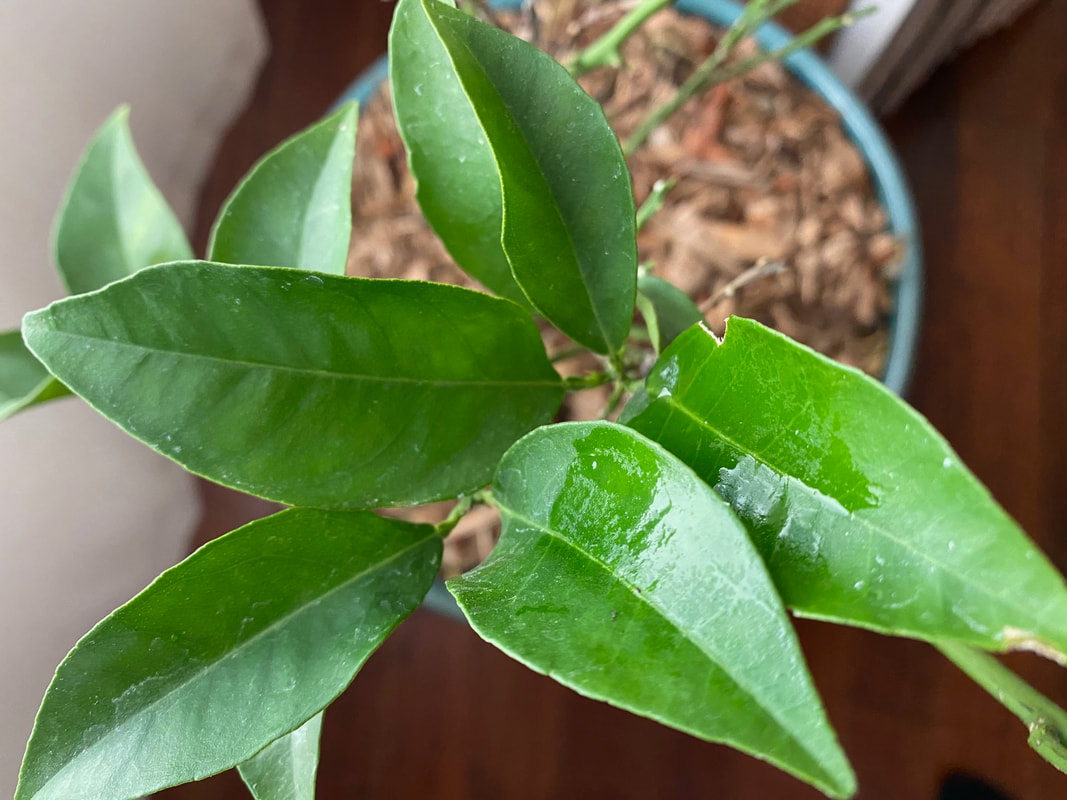
1) GROWING CONTAINERS: Buy pots or seed starter containers that allow for sufficient drainage of your soil. Some pots have built in trays to hold the water that drains through when watering. If yours does not, you'll want to purchase a silicon or metal tray to catch the run off. The container size should allow for your veggies roots to grow and should be at least 3-6 inches deep for hot weather crops like tomatoes. If you are planning on transplanting your indoor starters outdoors in the spring, this size container is great. We recommend steering clear of plastic containers containing BPA and chemicals that leach into your soil and food overtime. Stick with ceramic, clay, metal, wood or biodegradable containers. The advantage of biodegradable seed trays for those of you who will be transplanting your starters outdoors is they can help reduce the shock and damage to the root system during transplant. If you can't afford the ideal containers this year you can get ask your local nursery for extra free plastic starter containers. Or if your into DYI you can make your own homemade seed container pots with free materials! If you are planning on growing your plants year round indoors make sure you get a much larger pot, at last 1 gallon. You can even grow some fruit trees likecitrus indoors year round in a large pot located near the window to get adequate filtered sunlight.
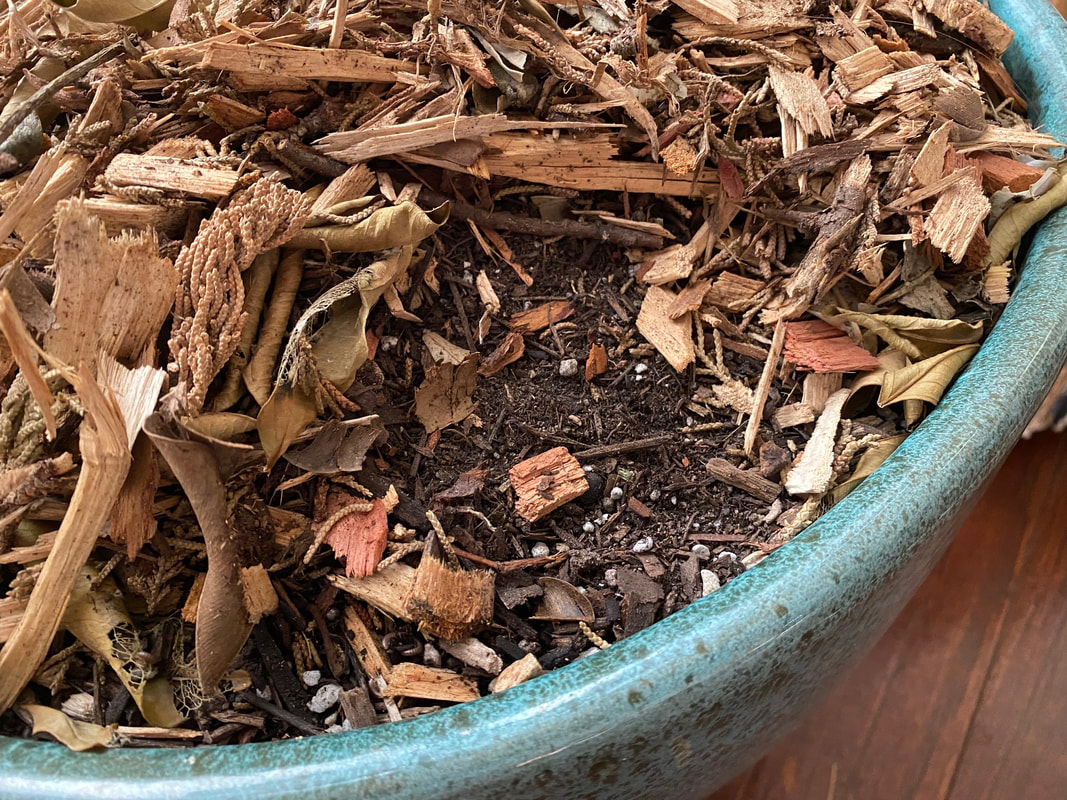
2) COMPOST: First, you'll want to fill your indoor growing container with compost. If you have an established Back to Eden Garden you can simply use a hand shovel and scoop some of the composted wood chips from your Back to Eden garden into your pots! If you have access to other homemade compost from veggie scraps or manure you can also use this as your growing medium. Fill your containers only about 85 %, leaving a little space on top. You'll see why in the next steps. Wood chip compost is a great growing medium not only because it's easy to access for free, it's loaded with nutrients but it's also thriving with beneficial microorganisms that are essential for healthy soil. When you buy sterile bagged compost it does not compare to the amount of seed growth stimulation that homemade wood chip compost offers. If you have a pile or deep layer of wood chips that has been sitting outside for 3 months or more you can also use a compost sifter screen to filter out beautiful compost from the larger wood chips!
If your wood chips have not composted fully into dark rich soil or you don't have a backyard garden to harvest compost from we recommend you buy organic vegetable potting soil. We also recommend investing in beneficial Soil Microbes to add to your soil occasionally. Beneficial microbes stimulate healthy soil and better root growth in plants. The microbe fungi actually form a symbiotic relationship with the plant. They can be especially helpful to add to any indoor gardens or pots since indoor potting soil does not contain enough beneficial microorganisms. I have added microbes to all of my indoor edible plants soil and it makes a huge difference. Living soil is vital for healthy plant growth! 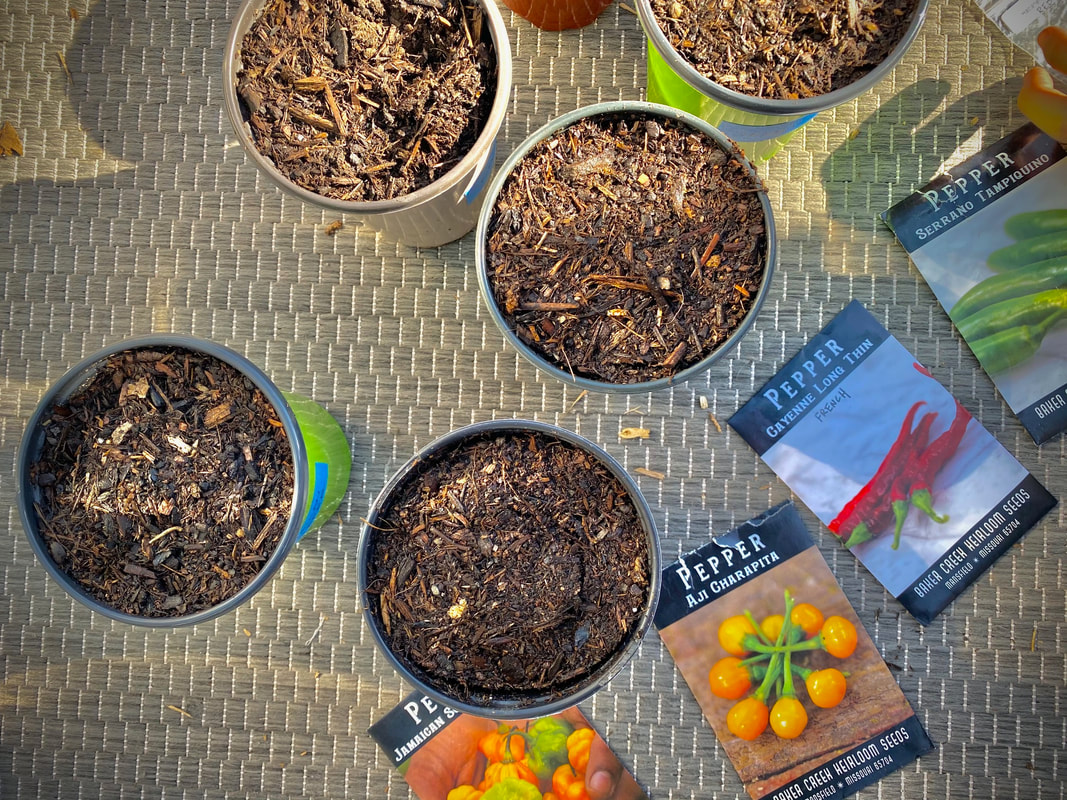
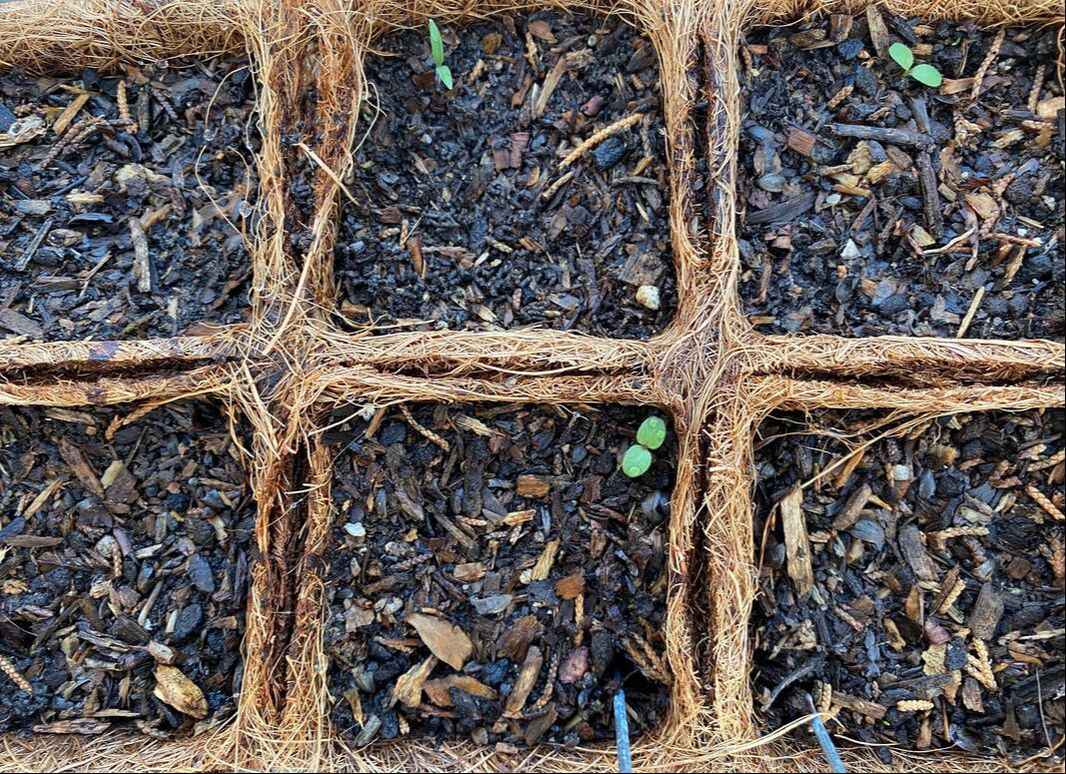
Starter Seed Containers with Wood Chip Compost Growing Medium
3) LOCATION, LIGHT & WARMTH: Seeds need sunlight to germinate. If you have a window sill with plenty of direct or indirect sunlight this works great for many indoor veggies. If you do not have a location with enough natural light, consider purchasing a full spectrum LED grow light. It's worth the investment and quickly pays itself off with the food you'll grow year round. You will also be able to extend your growing season. Also consider the temperature of your indoor veggie garden location. Most indoor veggies like to grow at 60°F/15°C or 70°F/20°C temperature range consistently. If you keep your home nice and toasty over the winter most starters will be ok without additional temperature control. Using an indoor seedling heating mat will help if your home is too cold.
Alternatively, if you are in an area with lots of sunlight year round outdoors but don't have a good location indoors to set up a grow light or access indirect light from windows then a greenhouse may be better fit for you to grow your vegetable starters in during the colder months. 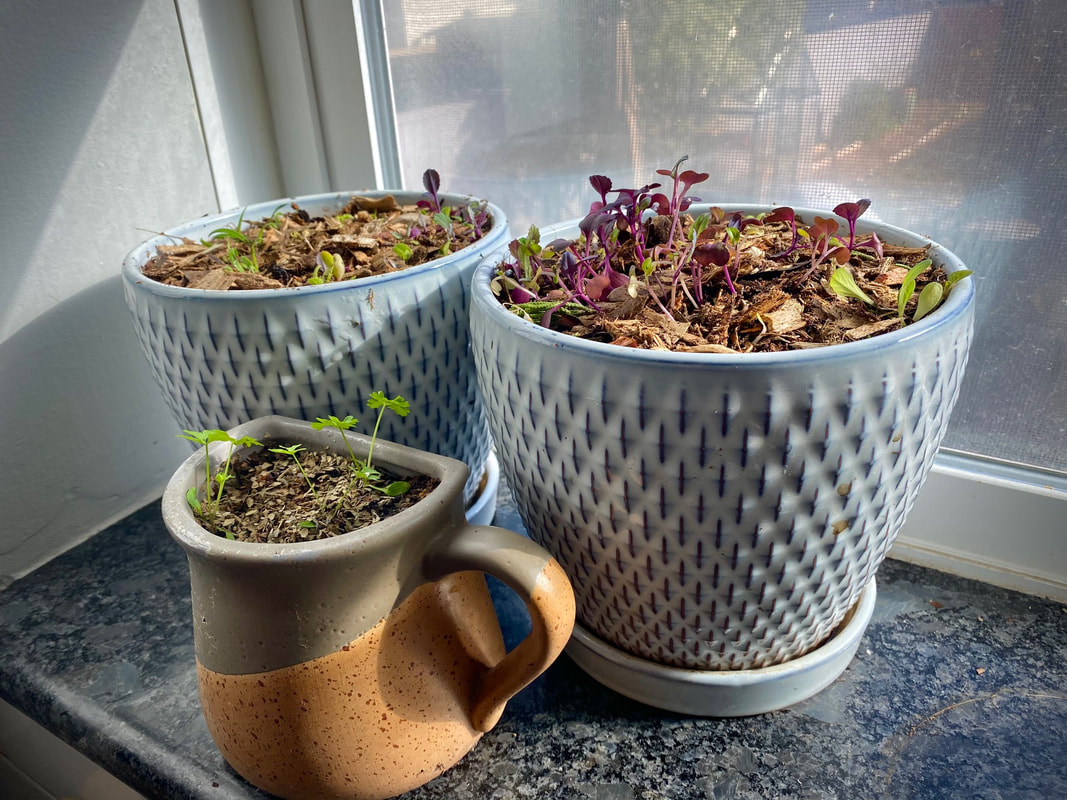
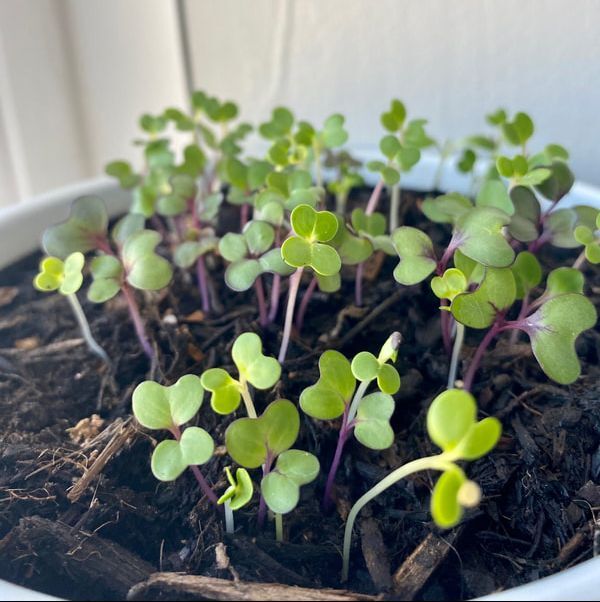
Growing Lettuce Microgreens & Herbs Indoors with Filtered Sunlight
4) PLANT SEEDS & WATER: Plant your seeds closer to the surface of the soil, just below the compost for best results. Soak them in water overnight for an extra growing boost. Water the seeds daily until they sprout. Always ensure your soil is damp but do NOT overwater. Especially once your plants are established their roots will help them draw moisture from the soil and they will require less watering. In fact one of the top causes of failed indoor plants is overwatering causing root rot. Consider a metal watering can to make your indoor watering easier and avoid a splashing mess.
5) WOOD CHIP MULCH: This step is really what makes the Back to Eden Gardening indoor growing method the most unique and leads to better results. Once the seeds sprout and get a few inches tall, add a light layer of wood chip mulch from your garden to the surface of the compost. If you are growing indoor trees or established perennial plants you can be much more generous with the amount of wood chip mulch on top. When you add wood chip mulch to baby starter plants be careful to only add a light layer to not suffocate seeds. It's best if you can add screened wood chips on top for a more delicate covering. The wood chips will help retain moisture, maintain soil warmth, build healthy soil and deposit nutrients into your soil that help the plants grow. Keep your wood chip layer light, just a dusting. Don't smother sprouts! Wait until they show are least two leaves to dust the soil surface with mulch.
Large Indoor Growing Pot Filled with Compost & Topped With Wood Chip Mulch
6) FERTILIZE: Seedlings aren't able to absorb nutrients until they have a second set of leaves called the "true leaves." Get to know the fertilization needs of your indoor plants and starters. Some vegetables require more nitrogen to stimulate their initial growth while others can survive without any additional input. The best choice at this stage is to give plants an organic, diluted, balanced, liquid fertilizer, so that the plant receives overall nutrition. Once plants are larger and transplanted, start applying a more focused fertilizer (except potassium at transplant). For starters like tomatoes and peppers we you can add an organic diluted fertilizer every few weeks to help their initial growth. However, the compost you are growing in is so rich in nutrients that it will not need much help like normal indoor plants in potting soil would! In fact, in healthy Back to Eden wood chip compost you won't need fertilizer. It's just a bonus if you have access to it.
Growing Bok Choy Starters In Biodegradable Containers Indoors
Some varieties of seeds don't do as well when started for transplant compared to being direct sowed. Although any of these varieties are possible to grow and transplant, these may have a more difficult time with the transition and be more susceptible to transplant shock.
easiest indoor GARDEN veggies
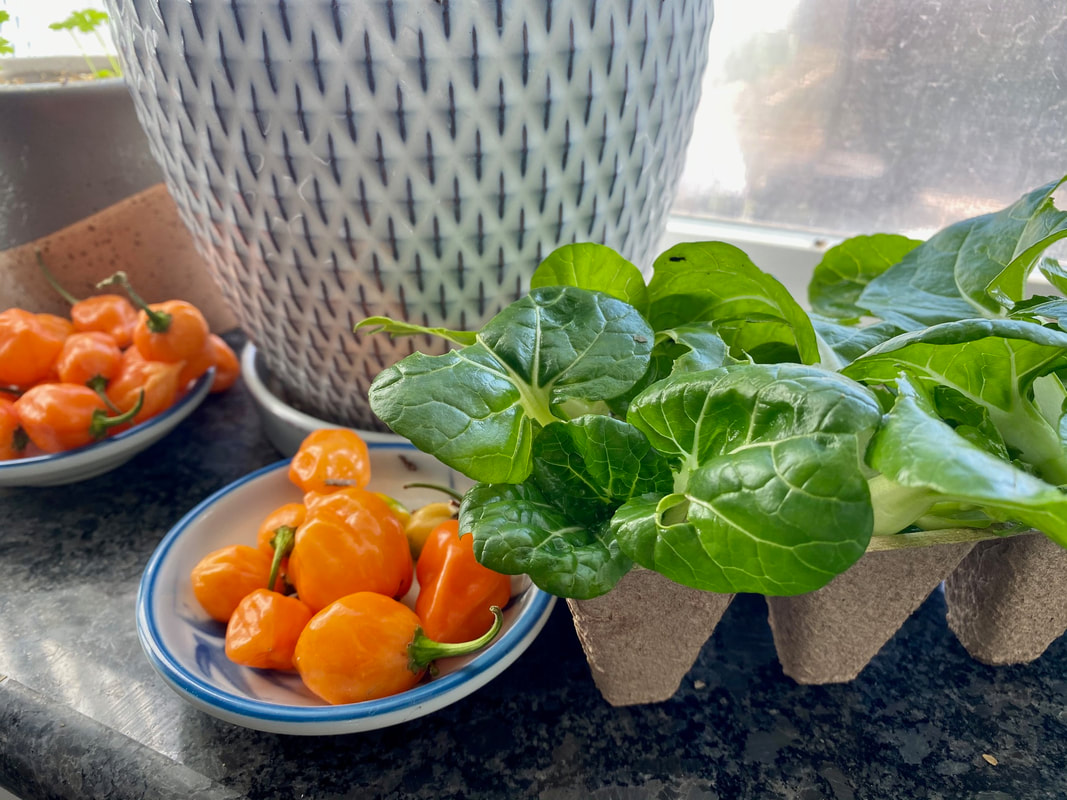
Even if you decide to wait to direct sow all your seeds in the spring and you don’t want to bother with any starters indoors you may want to consider growing some of the easiest edible plants and herbs indoors for year-round access. This part of the article will teach you how to grow the easiest veggies indoors using the Back to Eden Gardening principles!
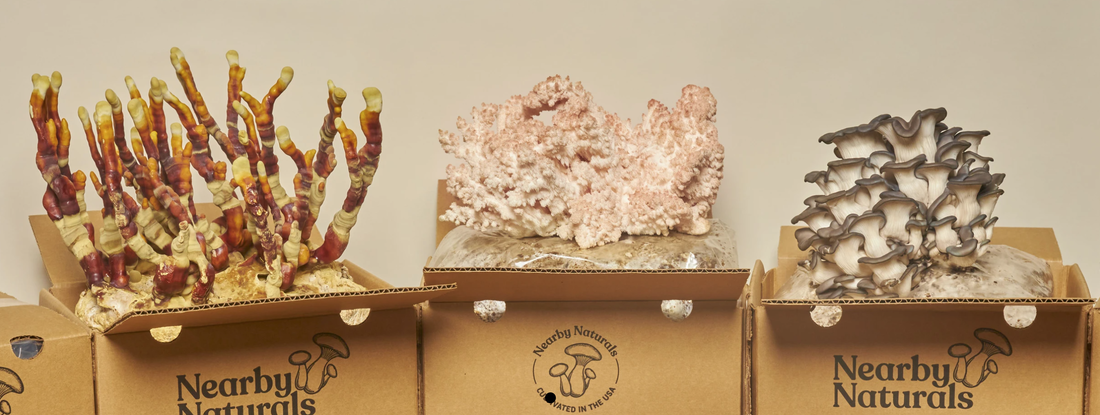
Growing Culinary & Medicinal Mushrooms Indoors, Photo from Nearby Naturals
7. Mushrooms Mushrooms also make the top list of easiest and most nutritionally beneficial foods you can grow indoors year round. They don’t require a lot of space or light to grow prolifically. They like to grow in environments with sufficient moisture. Plus they are packed with disease-fighting vitamins and minerals that you can’t find comparably in most other foods! Fungi grow from spores, not seeds so so keep them from getting contaminated by other fungi spores. You can opt to grow mushrooms easily in starter bags and even use the excess spore growing medium to start a mushroom bed outdoors. Shiitake mushrooms are one of the easiest edible varieties to grow for beginners.
TIPS FOR GROWING VEGGIES INDOORS:
Light: Ensure your plants have access to plenty of natural sunlight by setting them near a window. If you invest in agrow light you can grow almost anything indoors!
Soil: Use an Organic Potting Mix for Veggies with bagged Organic Mulch on the Surface or a Scoop of Composted Wood Chips from your outdoor Back to Eden Garden. Drainage & Air Circulation: Ensure the containers you grow your veggies in allow for plenty of water drainage and air circulation. If you over water or the water cannot drain from the container your plants roots may rot. Drainage holes or proper indoor growing containers will allow air circulation and present mold and fungus. Temperature: Most indoor veggies like to grow at 60°F/15°C or 70°F/20°C temperature range consistently. Using an indoor seedling heating mat will help if your home is too cold. Fertilizer: Just like us, indoor plants like to be fed regularly in order to thrive! Use an organic, odor free fertilizer to add every few weeks as needed. Alternatively, add homemade compost. 
Indoor GardenING KITS with GROW LIGHTs
If you don't have enough natural sunlight in your home for growing veggies indoors you may need to consider using a full spectrum LED grow light starter kit to start your garden indoors. Oh yeah, they are also self watering too! If you or someone you know doesn't have such an indoor gardening green thumb, this can be a helpful modern tool to ensure success without stress or work. Although my first impression of these was that I would not personally buy one of these, I can see how for beginner gardeners, gifting or urban growers that these could be a great option to get started.
Indoor Grow Light Garden Kits make growing your own food and herbs indoors easy. Their kits contain everything you need to get started with an indoor garden from the seeds and soil pods to the full spectrum light and easy self watering pot design. The plastic containers are also BPA Free. 
For Back to Eden Gardeners we suggest a few upgrades to your Click & Grow system for better results. First, we recommend replacing the soil pods with Back to Eden wood chip compost from your garden beds outside. Also consider purchasing your own organic, heirloom seeds to supplement the seeds included. Remember to reference the herbs, greens and fruits list above to choose the seeds that will grow best indoors.
If you don't a self watering grow light kit like above you can opt for a full spectrum grow light that you can set up your own indoor veggie growing space with. If you are serious about growing a wider variety of food indoors during the winter than the varieties on the easy list above, you will probably want a grow light and heating mat. INDOOR PLANTS MAKE A HAPPIER FAMILY HOME
Interior Decor with Edible Garden, Photo By HomeGardenandHomesetad.com
Many of us are spending more time at home together this year than ever. Especially during uncertain and stressful times, it's important we do whatever we can to maintain good vibes in our homes. Growing food indoors is a great interactive experience for families of all ages. Watering and watching sprouts grow will keep your kids entertained, educated and inspire curiosity about trying new foods. Spending more time indoors together also means the parents are needing to make more of an effort to maintain a healthy and inviting indoor living environment for their families. Growing plants indoors actually helps purify and improve indoor air quality by releasing oxygen and therapeutic herbal aromas into your home. It also adds an attractive interior accent of color that triggers our brains endorphins and adds vibrance to any interior decor.
Many gardeners have never tried to grow food indoors during the winter months because they imagine it will be too difficult, or too messy. That's why we are sharing the easiest veggies to grow indoors with less work and no mess. We believe that you and your family will enjoy a successful harvest and experience the mental and physical health benefits of gardening indoors!
Benefits of Growing Vegetables Indoors:
During the second wave of the COVID-19 pandemic, we are seeing another surge of supplies emptying off the shelves as people around the country prepare for an uncertain future. We are especially seeing scarcities in food items, toilet paper, canned goods, sanitizers, vitamins, and heirloom seeds. We have faith that all of us will not just survive but thrive during this coming year despite any hardships that we face as a result of the pandemic. It is vital that we all share positivity, generosity, and provision that will enable us all to live healthier and more joyful lives. That's why we are recommending our top survival seed kits as one of the most beneficial investments to make for yourselves and gift those you love in this season. AGRICULTURAL RESOURCE KITS
We also love the FREE Seed Guide that is included which gives growers detailed planting instructions, plant uses, and even teaches you how to save your own seeds. This kind of knowledge allows growers the freedom to replanting their own seeds for the rest of your life! Lastly, you can't find comparable packaging to this seed kit on the market. The unique design keeps seeds safe from natural disasters and helps preserve their viability for up to ten years. The Cons: The cost of the ARK Seed Kits are higher than some of their competitors. However, when you consider the high labor and maintenance costs of a small family farm based in the USA, it is easy to understand the extra value of what you are paying for. Conclusion: ARK offers the best Seed Bank in terms of packaging security plus the value of a seed saving book, if you willing to pay extra. ALL-IN-ONE MEGA SEED BANK
Why we like it: The Seeds Now Mega Seed Bank offers comparable quantities of seeds and numbers of varieties to their competitors seed kits for a lower price. Due to Seeds Now being a larger company they are able to offer reduced prices on their seed banks. More importantly, they are set up to maintain the strict California Seed Law standards including regular testing and labeling of their seeds including individual germination rates and Non-GMO contamination testing. The Cons: The Seeds Now packaging is similar to the ARK Seed Kit, however it is not quite as heavy duty of a material. Conclusion: Seeds Now offers the best Seed Bank if you are on a budget and want to invest in seeds that have undergone the highest quality control procedures. So, remember to shop smarter this year, Back to Eden Gardeners! It's easy to purchase items out of panic that simply do not sustain life in the future. Be wise and invest in self-sufficiency that will enable your family and our nation to lead lives of greater abundance and prosperity!
Still Image from Back to Eden Film.
WHAT IS A Wood chip compost heating SYSTEM?
If you are a Back to Eden Gardener, you have probably witnessed how wood chip piles begin to steam and feel warm to the touch as they decompose after only a matter of days! But did you know that the center of these wood chip piles reach temperatures capable of heating water and air up to 140°F? We aren't talking about burning wood chips as a fuel for fires. We are talking about harnessing the natural heat generated from the composting process of wood chip piles. We have discovered an age-old heating method that enables you to heat your two story home, greenhouse, warehouse, or bath and shower water using composting wood chip piles!
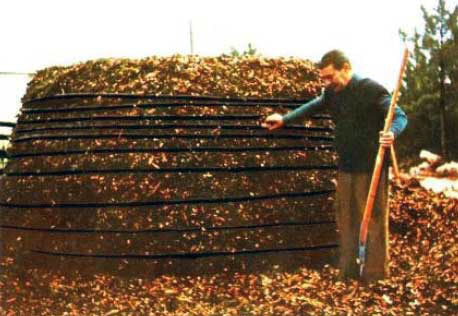
Photograph from Jean Pain's Book, Another Kind fo Garden.
JEAN PAIN INVENTOR OF COMPOST HEATING SYSTEM
Jean Pain was an inventor from the south of France born in 1928 who discovered a brilliant way to harness the heat produced by composting wood chip piles as an off-grid heating source! He created a highly efficient method of producing 100% of his own energy needs using nothing but wood chips! Not only can his method help reduce your energy bills, it also can help you grow food year round by heating your green house or indoor growing room.
Jean Pain’s system was able to heat water at a rate of 4 L per minute. That’s almost 1 gallon per minute of hot water produced with nothing but the heat from composting wood chip piles. That kind of heat output surpasses the capabilities of many modern water heaters! Jean Pain proved his system could satisfy his daily needs for heat and hot water from clothes washing to bathing and indoor heating. How to Build A wood CHIP HEATING SYSTEM
All you really need to build a simple wood chip compost heating system is a large pile of wood chips and lots of polyethylene tubing. You’ll also want a wood chip compost soil thermometer to test how hot your pile is getting inside. Some people use horse manure in addition to the wood chips in their pile. Manure is another great heat producing resource that is often readily available and free to your wood chip compost pile. Of course depending n your needs you may want to build a slightly more advanced system.
Photograph from Jean Pain's Book, Another Kind fo Garden.
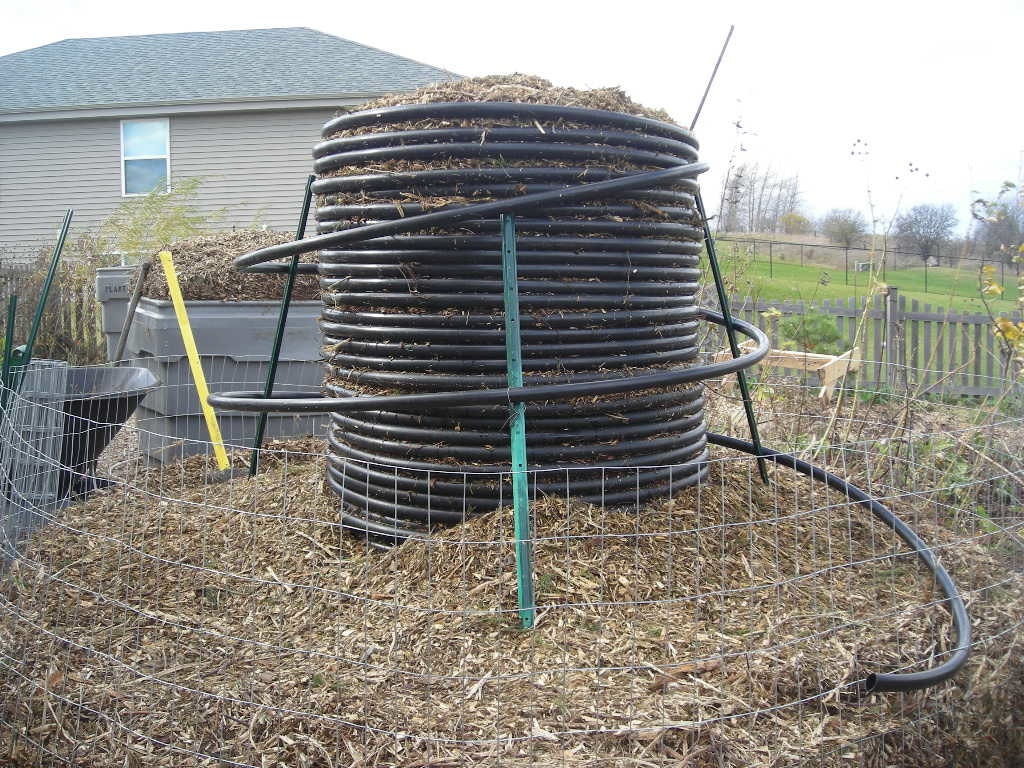
Usually your pile will start with a compressed layer of compost followed by a layer of coiled tubing followed by a layer of compressed compost until you reach the desired height. When creating a wood chip pile for the primary purpose of generating heat, it is ideal to compress the wood chip pile together into a condensed mass. This will create anaerobic bacteria which conducts more heat in the pile. In our gardens, we try to avoid too much anaerobic bacteria by allowing naturally occurring air space during decomposition. However, in wood chip compost piles used for the purpose of a heating system we want to compress the air space out of the pile. We can accomplish this sufficiently by creating a cylindrical container for the compost pile. Jean Pain used chicken wire to hold the pile in a more upright, tall formation which allows the gravity to condense the air out of the center of the pile. Many people also add hay barrels as a final perimeter for their wood chip compost piles. The key to harnessing the best heating results from your pile is to use plenty of tubing material, coiling it throughout the wood chip compost pile. For example, for a 6ft x 6 ft compost pile you will need about 300 feet of 1 inch diameter tubing. The concept is actually very simple!
Jean Pain's Book, Another Kind fo Garden.
WOOD CHIP Compost WATER HEATER
The design of your system will depend on if your goal is to heat water or to heat a space with hot air. An open loop system means the input is attached to your tap water, and the output is hot water. This is the most is a simple design, capable of providing 140°F tap water for six months at a rate of 4 liters per minute from a large wood chip compost pile.
If you are building a wood chip compost heating system for the purpose of heating water, you will also need a metal water heating tank. This is placed inside the center of the wood chip compost pile and then the pile is wrapped with the plastic tubing. As you can see in the diagram below, it works best to contain the water heater in the center of the pile in a simple construct of wire mesh and wood stakes in order to ensure the water tank is hugged closely with the compost material. 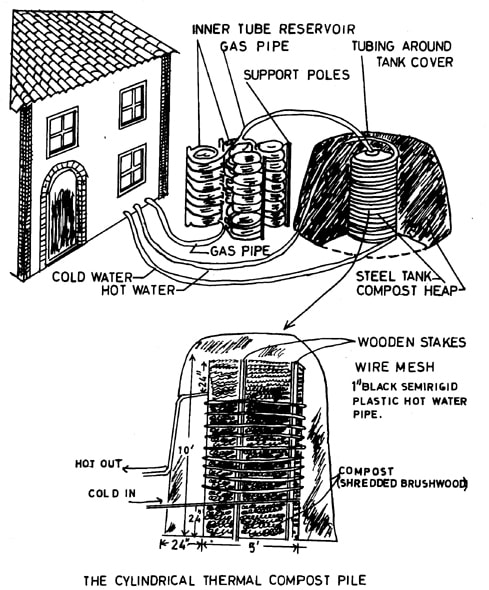
WOOD CHIP WATER HEATER SYSTEM SUPPLIES
ADDITIONAL SUPPLIES FOR Green House & Home HEATING:
HeatING GREENHOUSE WITH Wood CHIP COMPOST
Does the thought of wood chips make you feel warm and fuzzy? In fact, wood chips literally can make you and your winter veggies stay warmer year round! Why waste your money buying expensive electric or gas heaters to keep your winter crops from freezing when you have free wood chip piles generating 140 degree temperatures at no cost!?
If you haven't already laid wood chips down on the soil in your backyard garden, farm or green house then this is the first thing we recommend you do for over-wintering vegetables. This will help insulate the soil and the decomposition of the wood chips will generate heat that helps plants grow more readily in colder temperatures. The thicker the wood chips, the more heat they will generate. Keep this in mind to avoid burning any plants. Some people heat their green house with very simple methods of compost heating. This can involve digging trenches in between rows of vegetables and adding fresh compost to decompose in place, generating heat at the soil level. A wood chip compost pile on its own left in an enclosed space will help generate some amount of heat during the decomposition process. However, wood chip pile left inside a contained space runs the potential risk of combustion if not turned and watered regularly. However, by far the hottest temperatures occurring in wood chip compost piles are at the core of the pile. Therefore harvesting the core heat to bring to the surface as Jean Pain teaches is much more effective in achieving higher heat output.
Heating Your HOME FOR FREE USING COMPOST
Of course, using the same heating system design that warms your green house can be highly effective for also heating your home. An artist living in Nova Scotia named Franz Fraitzel recently made headlines in the news for having put to use the forgotten concepts of Jean Pain by creating a furnace capable of heating an entire two story warehouse in the snow using free wood chip piles! He is applying the same principles of harnessing heat from wood chip piles pioneered by Jean Pain. Franz then used a converted industrial furnace to blow the heat into his workshop combined with donated materials and polyethylene tubing. He says he turned his industrial furnace heating bill totaling $600 / month into a one time investment of $1,000 for a lifetime of free heating. In addition to being a cheaper option for heating it is also uses renewable resource from wood chips from tree trimmings. Not only does this system offer a reduced impact on the environment it also provides a self sufficient heating source during power outages. One wood chip heating pile of the scale that Franz is using can last for up to a year of producing sufficient heat before needing to be refueled with a fresh wood chip pile!
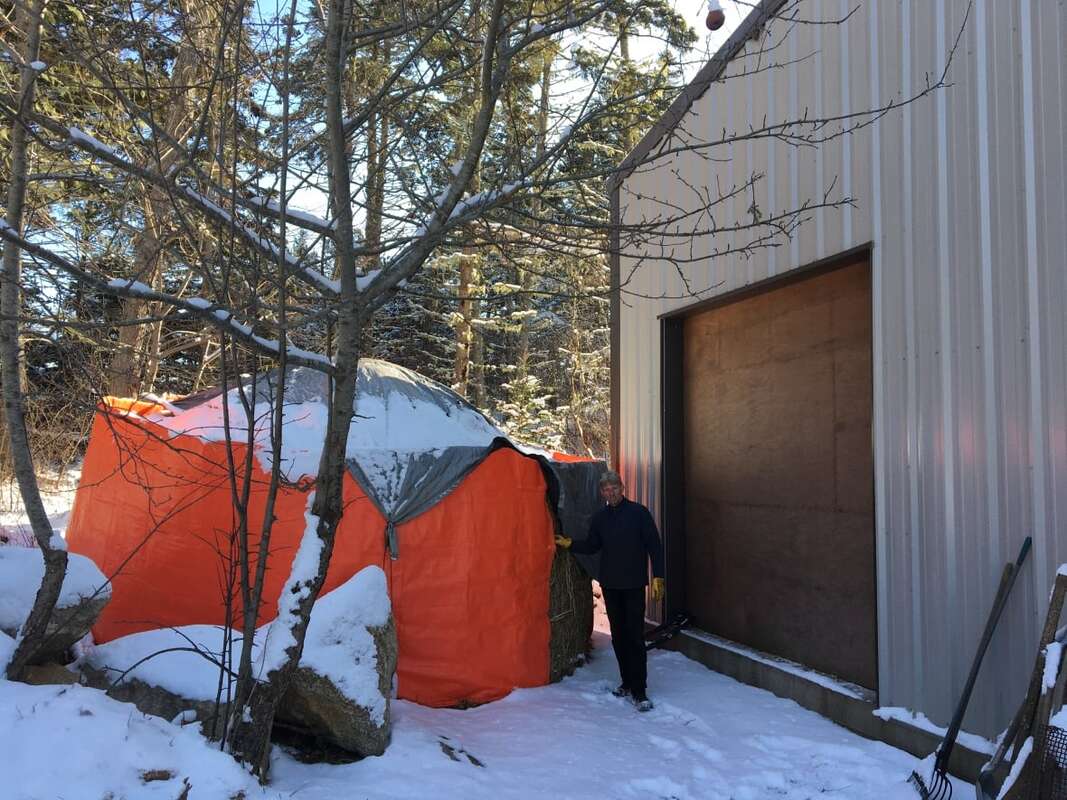
Photograph of Fraitzel’s wood chip heating system by Carsten Knox/CBC
recycle composted wood chips in gardens
After your wood chip pile has composted for up to a year, the composted wood chips should be removed from your heating system and a fresh wood chip pile for your heating system should be built for the coming winter. However, make sure you don’t let the composted wood chips go to waste! Remove the composted wood chips and add them to your garden beds in the fall. If the composted wood chips have turned into anaerobic compost they will smell like ammonia and be very wet. In this case, you should mix in some fresh wood chips and nitrogen to help the compost return to an aerobic state which means it has sufficient oxygen present and isn't overly acidic. Simply layer fertilizer, recycled wood chip compost and fresh wood chips on your garden bed and after a few months the soil will be noticeably enriched. Your plants will love it in the spring and your soil will absorb the nutrients from the compost tea that is created all winter as they break down. 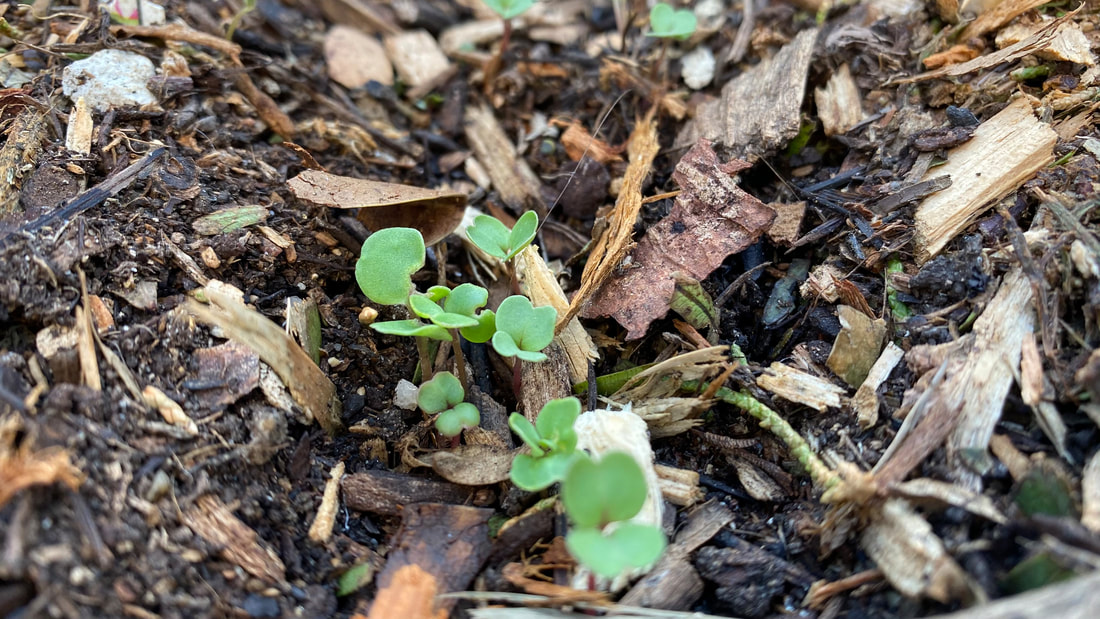 Photograph by Dana Richardson, Back to Eden Gardening. Photograph by Dana Richardson, Back to Eden Gardening.
For more details on how to build your compost powered heater there are many great plans, videos and articles available online!
|
AUTHORS
Dana Richardson & Sarah Zentz, Producers of Back to Eden Film
 Categories
All
 |


 RSS Feed
BACK TO EDEN GARDENING |
JOIN THE MOVEMENT |
CONTACT US |
© 2022 Back to Eden Film. All rights reserved.